Showing posts with label oak house studio. Show all posts

Tuesday, 7 June 2016

Introducing The New Texture Stamp Set

Hi all
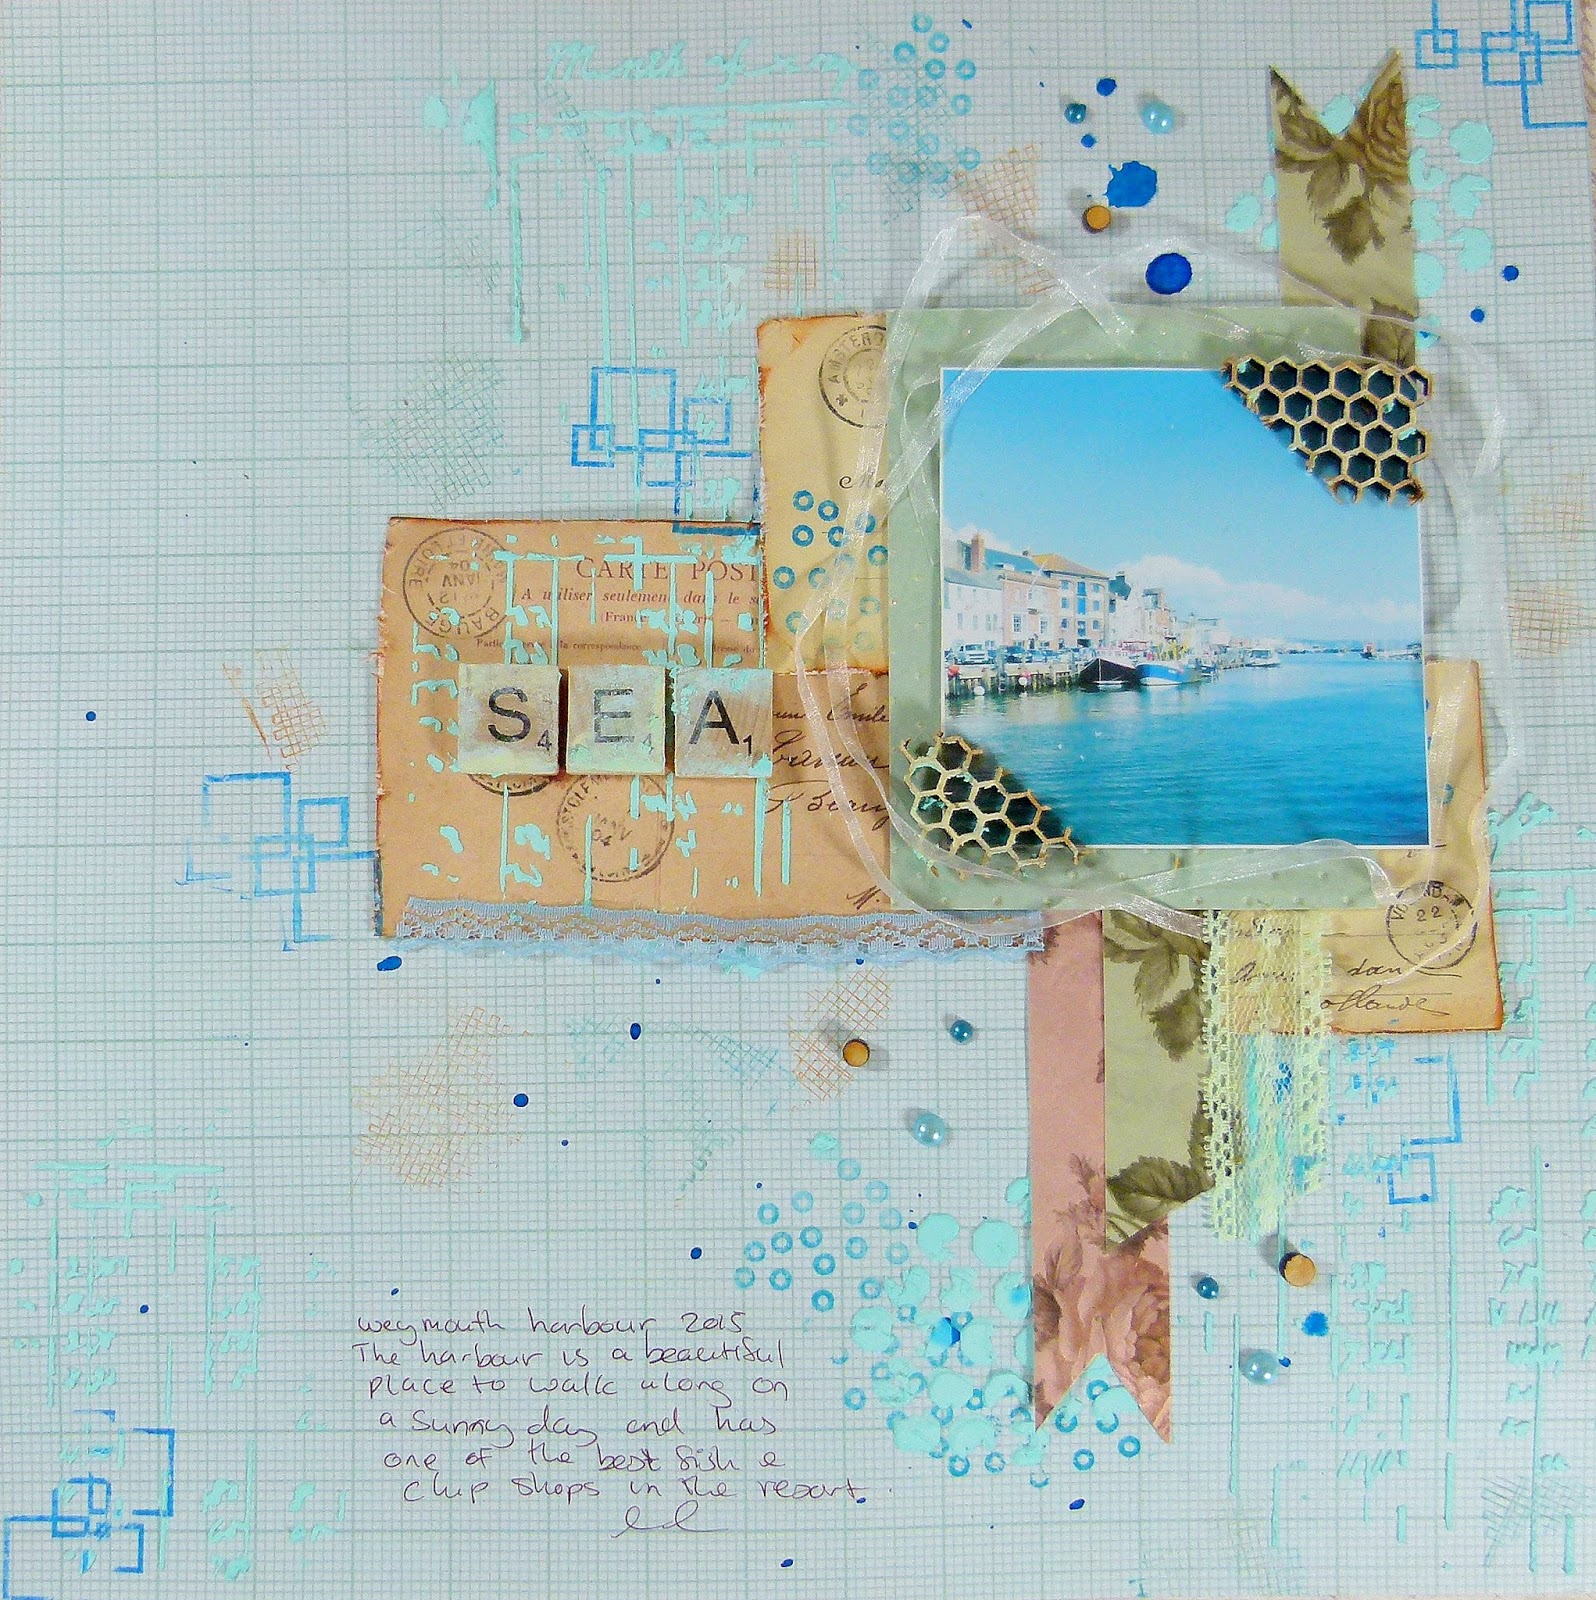
I am up on the Oak House Studio Blog with a new layout and I have some new texture stamps to show you. These are the larger versions of the texture stamps that come with the Double Daisy set but now are a good size for mixed media projects.


I started my page off with some stenciling around the layout using texture paste mixed with Peacock  Pure Colour Chemistry Ink. I used the Ledger Sheet stencil mask by The Crafters Workshop and added the texture randomly around the page. I then Flicked Sapphire Acrylic Ink


                            I added some lace trims to my page and dotted around a few pearls


I cut up a couple of sheets of Gypsy gypsy paper pad and cut out the postcards. I distressed the edges and added stenciling on them before layering them up.


I took the texture stamps and stamped them around the page and over the stenciling. I used Vintage Sepia and Cobalt Blue Colour Chemistry Ink Pads.


I added more of the texture past around the scrabble tiles to distress them


Thank you for visiting 

Wednesday, 13 May 2015

Back to nature with Oak House Studio

Hello everyone, today I would love to share my love of nature inspired by Oak House Studio`s
Here`s what happens when you play with air dry clay, a stamp and inks . . .
. . . they may be a little rough around the edges, the leaves a little dimpled, the snail may have been through the wars { lol }
BUT
I do love the roughness off them along with bursts of inky coloured goodness . . .
the sun came out at just the right time to take these pictures. 
These two little plates have now had a coat of varnish and will be heading to my shed at the allotment to enjoy our fresh produce on over the coming months.

{ sorry I got carried away and didn`t take any before photos}
Just knead your dough till it`s warm and pliable, roll it out to whatever thickness you want and apply your stamp.
 Be sure to leave it for a few days to air dry before sanding and getting messy with the inks . . .spraying, splatting, brushing, having fun!
Thank you for looking
Big hugs
Tracy
xoxo

Wednesday, 29 April 2015

Colouring and having courage with Oak House Studio . . .

Hi everyone, Tracy here today sharing the first project that I created using 
Oak House Studio`s
I remember the day my parcel arrived to create my layouts, I could not wait to try them out!
 Canvas, pencil and a little doodle dooooing later I came up with my girl
 " Courage "
Mixing together the inks from the French Quartet to colour her wings . . .
 adding the teeniest amount of ink to acrylic white paint for touches of blush . . .
the background . . . more deeelish Ink applied using a baby wipe to work it into the canvas, a drop goes a long way using it like this.
I remember going over the wings and background working the inks in with baby wipes and brushes until I was happy before
 flicking and splatting a few of the inks to break up the background. 

I honestly can`t begin to tell you how much fun I had using the inks to create my wings, background and blushing cheeks on my girl
plus
how super quick it is to cover a canvas with ink using baby wipes.

I hope you have a go and enjoy all the splatters and splots along the way!

Catch you next time, I am now officially addicted to inks, lol . . .
Big hugs
Tracy
xoxox

Tuesday, 28 October 2014

New Firework Stamps for the borders and frames challenge

A lovely project from Doreen using the new Firework stamps and the Block frame that we have recently released at Oak House Studio.


List of ingredients :

1 piece of black glossy card
1 piece of Acetate
Versamark ink pad
Selection of mica powders
Colour Chemistry Acrylic Inks, Citrine, Malachite and Silver
Double sided foam tape
Black Fine Line Marker Pen
and Fine Line White Paint Marker

Firstly stamp the frame onto the Acetate and leave to dry.
Next take the black glossy card stamp fireworks randomly using the versamark.
Using a dry paint brush take the mica powders and lift a little of the colours you have selected and tap a little of each colour in no particular order over the stamped  images. Then using a very soft brush dust the colours over the images to colour the fireworks. Tap off the excess powder and buff with a soft tissue. 

Returning to the frame I used a white fine line marker to colour the frame and leave to dry completely once again, when done apply the double sided foam tape and cut of the excess acetate from the frame. Choose an area of the firework artwork that you are happy works in the frame and stick the frame to it. Cut the excess black card off so it is not showing outside the frame.
Take a card of your choice and stamp with Archival ink (black) Then write in squares Remember, Remember the fifth of November.
Next take the Acrylic Inks and shake the silver well and put a little onto a white tile, then a little citrine add some of the silver and colour the empty squares. Then I added a little Malachite to the citrine and silver to make a very pale shade of green and then graduated the colour all around the card using the 3 inks. 

If you go over the black of the frame don't worry as when you go over the letters again in the black fine line marker you can colour it back in. 

Mount the frame onto a piece of card from your craft stash and stick to card.


Thank you for looking, I hope you are feeling inspired and will come and join us in the challenge on Facebook.

Love Doreen


Wednesday, 17 September 2014

Autumnal Holly Leaves

Hello everyone hope you've all had a wonderful weekend.

I've been having a play with the holly leaf from the Big Christmas collection.  I started by stamping the leaves in a circular design very organically with black archival ink.  I then painted the whole image using neocolors II water soluble wax crayons.  I built the colours up gradually until I was happy with the depth.  I've added some gold acrylic and glitter to the leaves.  To finish off I added some red star gems in between the outer leaves.

The center of the card is made up of 5 leaves which have been stamped, coloured and cut out and then mounted using foam pads to give some depth.  

The berries are made from a selection of seed beads in a mix of red and gold - these were threaded onto some thin wire and just randomly twisted until they resembled a cluster of berries.

I've mounted this onto a cream A6 card to which I've stamped the leaves using the Spring Green and Dusky Rose pigment ink pads  - I added the dusky rose to the center of the leaf and then the spring green to the edges to get a two tone effect.


Until next time keep crafting.
Anita

Wednesday, 23 January 2013


I know keeping the blog up to date is one of my weaknesses so I am looking for some help.


Wanted crafters who love to use stamps in their projects.

As soon as I started stamping I became fascinated with how versatile they were and how many different ways they could be used. No surprise that I went on to start to designing stamps and create my own stamp company. I am looking other crafters from a range of backgrounds and crafts to join a design team. I have to admit this is my first full blown design team so I am not sure how it will all work out and I may need some help and ideas.
Requirements include:
  1. The ability to produce 3 projects from each parcel you will be sent. No more than one parcel in any one month. You won’t be needed every month so you if have some months you prefer to miss let me know.
  2. Good photography skills for taking pictures of your projects
  3. Projects posted with social media: Facebook, your personal blog, Oak House Studio Blog
  4. Participation in our blog, including writing your own posts.
  5. Participation in this year’s one stamp event. Details of last year can be found on the website. The provisional date for this year is 21st/22nd of September, but you will have your kit in time to make ahead of the date if need be.
Does that sound fun?  If it does, it’s about to get better.  Here’s what I’ll do for you in return:
  1. The featured stamp(s) plus inks and embossing powder sent to you in advance of the event.
  2. BONUS product chosen by YOU to be sent following your successful completion of this project.
  3. Link from our blog and Facebook page to your personal blog
  4. My undying gratitude and amazement for your creations
What do you need to do to enter?  That’s easy too! 
  1.  Submit photos of 3 of your most favourite projects that highlight your own personal use of stamps, and links to your blog or gallery to oakhousestudio@gmail.com (Projects do not need to use Oak House Studio products, but we’d love it if they did!)
  2. Submissions must be received NO LATER than Thursday 31st January 2013.
  3. Write up a quick bio about yourself, mentioning why you’re interested in being on the DT, what experience (if any) you have with DTs, and why you love stamping.
  4. Wait impatiently as I collect the submissions and choose who I can use for this project.
  5. I will keep your details on file and will contact you if I think you may be able to help us with design team work in the future.