Showing posts with label spray inks. Show all posts

Monday, 2 November 2015

Tags

For me the finishing off of every gift is a nice tag....
Here are some tags that I made using a selection of stamps and inks.
(Tags are also a great way for you to practice your stamping and spritzing or for you to use up any scraps that you have)....


 I created the ribbon rose and then spritzed it too. I love the shades of red that this has.


What is your favourite technique?
Is there anything that you would like to see as a tutorial? Let us know and we can get one made for you.

Nikki x

Friday, 30 October 2015

Building a wreath

I started this card by creating a sheet of shades of green. I did this by spritzing shade of green all over some white card.
Once this was dry I stamped the holly leaf all over it.
Then I sat and cut them all out - leaving a little border all around the holly - this makes the cutting easier but it also makes the holly in the wreath pop.
After I had create my base card with the papers I wanted I stamped a rough circle with the holly leaf stamp.
The I took the cut out leaves and started to glue them in position, the glue was only placed onto one end of each leaf - this lets you lift some of the leaves and create a 3d effect once everything is dry.
When the wreath was complete I finished off the card with some ribbon bows, adhesive stones and a greeting.


I have so many ideas for the leaf stamps so watch this space for some more ideas heading your way!

Happy crafting
Nikki x

Tuesday, 27 October 2015

One stamp, three different cards...

These cards were all made using the double rose.....another favourite of mine.
This stamp has both the inside image of the rose head and the outside image of the rose. This gives you a positive & negative effect when you stamp it.


Today my plan is creating some background papers with all my inks..... love being able to spritz and create my own background.
Whatever you are doing, have fun!

Happy crafting
Nikki x

Saturday, 17 October 2015

A wave from me...

Hi there, Nikki here.
I have loved playing with some of the amazing products from Oak House Studio as part of their design team.  So many things that you can create with good quality inks and stamps....

So, a little about me...... I live in Scotland just outside Edinburgh with my two mad rescue springy things..... I just adore my pupsters. And, if a beautiful part of the country that I stay in, very inspirational.  I work part time as a support assistant in a local high school and I teach and create crafty things the rest of the time.

I love all things inky, so getting to play along with the Oak House Studio dt has just been great!

Here is my first card that I wanted to share with you,

 By masking off some of the card, then spraying ink... you can create a colourful strip for the background of your card.
 I sprayed Jubilee Red onto some cream card stock and then stamped onto this the leaves from the Bumper Winter Leaves set.  I stuck the leaves together and added a lemon layer to create this flower. Really easy to do and very effective.

Keep popping back to the blog to see what the others have been making and creating.
I'll be back soon with a tutorial to share with you.

Until then
Happy Crafting

Nikki x

Thursday, 30 October 2014

Big Christmas Collection Christmas Card With Stamps from Oak House Studio.

Today's card  for Oak House Studio features 2 sets of stamp collections, the Big Christmas Collection and the 2 inch Journal Circles set.  For the background I used a mixture of regal claret, citrus orange and totally turquoise from the ink in a bottle range  and sprayed onto a glossy card.  The background was made on a A4 size card and I cut out this square as the colours worked well with the Sea Blue ink pad .  

To start with the construction of the card I stamped the dotted frame circle onto my background square.  Then I stamped the solid snowflake bauble from the big Christmas Collection onto white card stock with the sea blue ink.  I cut this out using a 1 inch circle punch (you can just cut around the bauble if you don't have a punch).  I then glued this to a flattened bottle cap, let it dry and then added the clear bubble dome on top.  I then applied this to the center of the stamped frame - if you score the back of the bottle cap with a scalpel it will help to adhere the cap to the background.  the corners are then stamped using the open snowflake bauble in the 4 corners of the background.  I've mounted the whole thing onto a coordinating paper from my stash of scraps.  To balance the whole card I added the words "Let it Snow" from the Snowflake collection.


Have a great day 
Anita


Wednesday, 3 July 2013

Inky Door Hanger

Elaine here with an Inky project - the request was use Oak House Studio's Ink in a Bottle and that's what I've done to create a door hanger. 


A while back I entered a challenge where we had to make something using the colours of our front door....well mine is white pvc but it does have a stained glass kingfisher in it so lots of blues, oranges and greens.  I started with a plain wooden door hanger and sprayed this with Jubilee Blue and Citrus Lime Ink in a Bottle, left this to dry and then sprayed again with Jubilee Blue and Peacock Green just to intensify the colour.  The inks soak into the wood beautifully leaving the grain showing through (see below). Just to finish I blended a little Midnight Pigment Ink around the edges.


Next I sprayed some white card with Citrus Yellow and Citrus Orange Ink in a Bottle. I gold embossed the large Sunflowers from Oak House Studio, cut them out and sprayed on a little more Citrus Orange.  For a highlight, I used a pipette to suck up a little Jubilee Red Ink and added that to flower centres.  The Enjoy stamp was inked with Midnight Pigment Ink and clear embossed.

All the Inks in a Bottle, Pigment Ink Pads, Sunflowers and Enjoy Stamps can be found here.

Thanks for taking the time to look.  Lynnda is having a give away so don't forget to leave a comment on the post here for your chance to win some Inks in a Bottle!!

Friday, 27 July 2012

Colour Chemistry in a Bottle

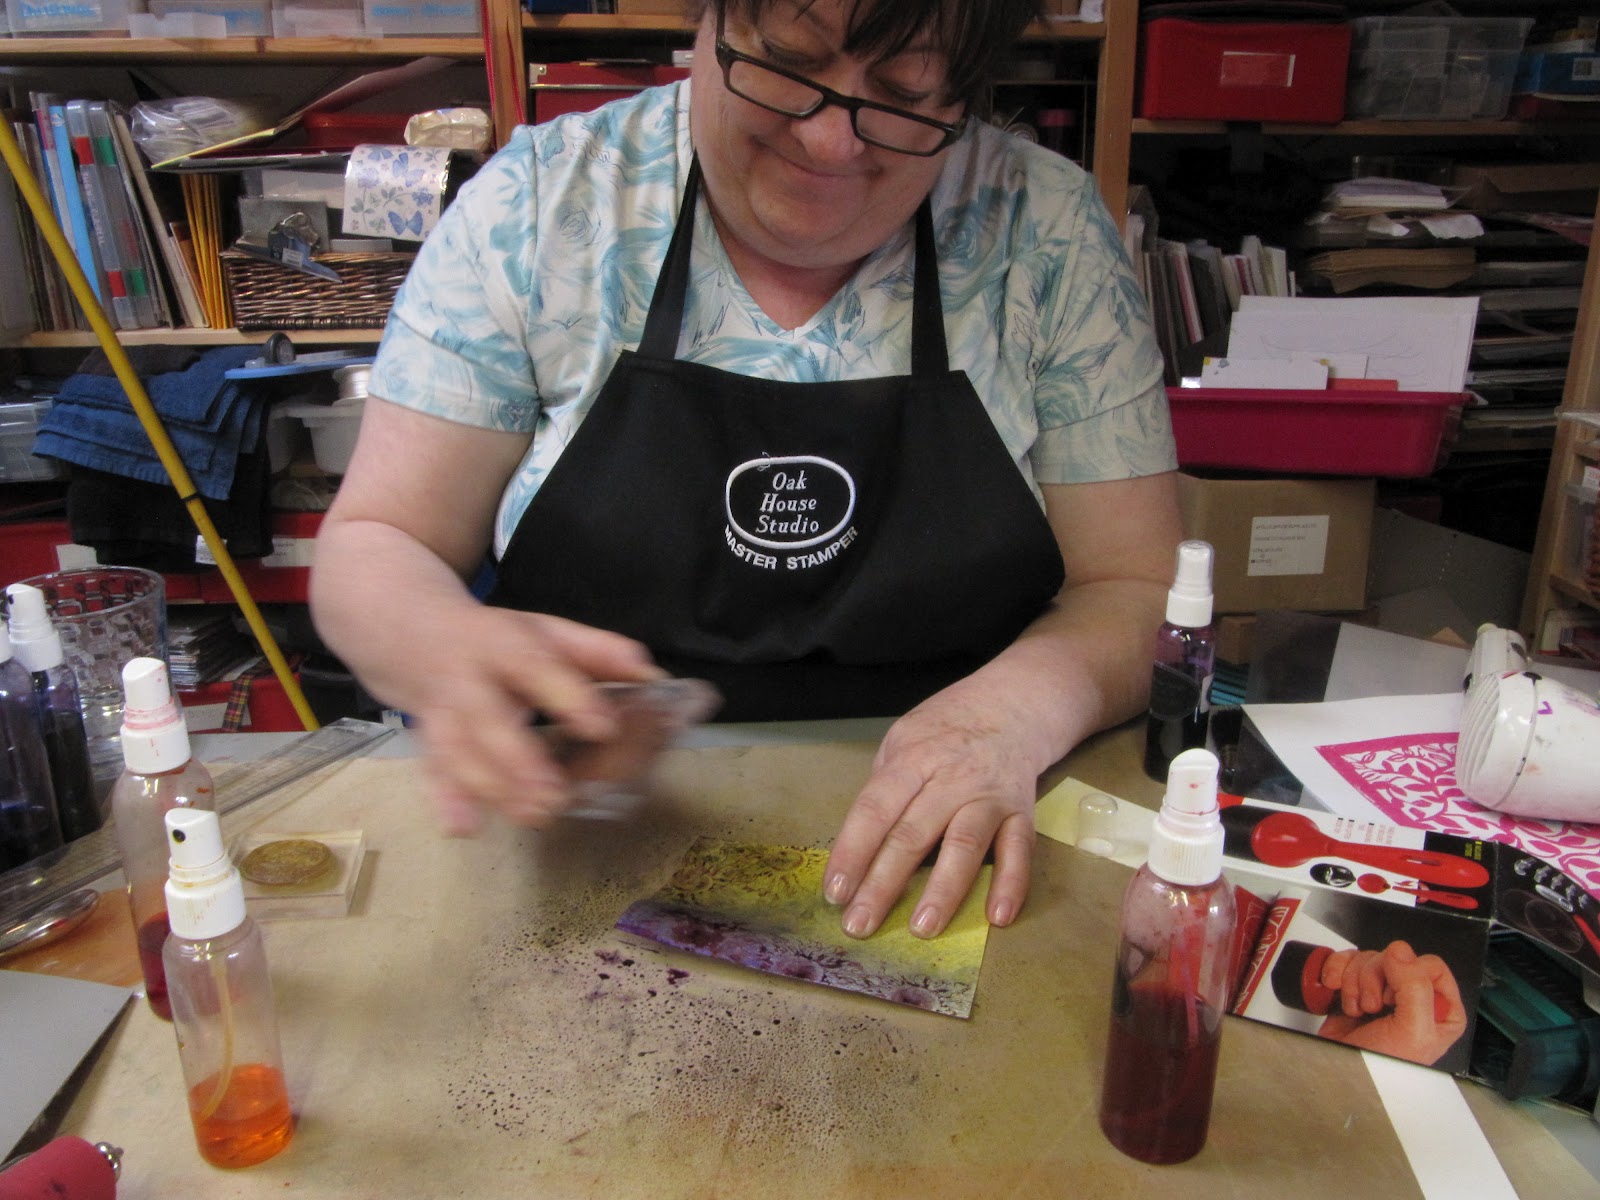
Here are some photos Ben took at a recent Open Day of me just playing and showing just a little of what you can do with the Colour Chemistry Inks. The possibilities are endless.

The height you spray from will change the type of outcome you get.

The closer you spray the more intense the colour and wet you get your project


Spray from about 6 inches (15cm) above the work to get a gentle mist.


If you can't wait for it all to dry, employ your heat gun

As it dries, you can add more colour.


Then dry again

Is this me using Purple and Yellow??

And now time to get stamping
Tap your stamp into all that surplus ink laying on your hot and messy mat.

Keep tapping till you think you have enough ink on your stamp.


stamp on to the card and repeat


LOVE IT!

still got some ink left, well find a tag or something to stamp on too.


Oh yes and why not try it on some of our cream stamping card?

hmm loving that too!


At this point I did clean my messy mat, but could have done lots more.

Well hope you liked this quick session on just some of what you can do with our products. The stamp I used was the medium Sunflower. The inks I used where Precious Purple and Citrus Lemon. We also sell tags, stamping card in cream and white 250gsm and of course Hot and Messy mats in two sizes.


Thursday, 28 June 2012

A day in the studio


Ben and I have had a busy day at the studio, we spent the morning cleaning out and re organising all my inks pads ahead of teaching the inks course on Monday. We spent the afternoon producing and bottle some new spray inks colours in the new bottles.
These bottles were on on offer at our normal suppliers and hold 75ml which is 50% more than our normal bottles. But we saved so much on the bottles we are going to be offering these at the same price as the "normal ones" so you will get 50% extra ink free. We have also splashed out on screw top AND spray tops, which means you can get both tops for our regular £4.99 price. That makes it easier to clean your spray tops at the end of a session without spilling your precious ink.  If you already have spray bottles or mini misters, we will also be able to sell the inks as a refill bottle for just £3.50
I do rather like painting with these inks too, so having the screw tops on is going to make that all easier too.
More colours to sort out next week too.
Please note that when requiring teenagers to help with production tasks generous helpings of Pringles and Quality Street certainly helps