Sunday, 18 October 2015

Oak House Studio on the TV

Exciting news!  Lynnda is back on the TV with 3 shows featuring Oak House Studio products so make a note in your diary, set an alarm and please watch.
 
HOCHANDA TV   Freeview 39   Sky 663

Wednesday October 21st

11am  Roses
2pm    Double Daisy
6pm   Best Bits

There are some classic designs plus lots of new stamps, new triple ink pads and Pure Colour inks. Just some of the new designs are featured on this card by Elaine Kettle.


The Pure Colour inks have been used to spray the background, paint the Rose and colour the twill ribbon. The new Rosebud Border looks fab stamped with the Triple Meadow Greens and the words are from the Friends Words set.

The Design Team have been really busy making samples for the show so don't forget to watch and be inspired......... Wednesday 21st, first show at 11am.

Apache Blessing


Doreen here with some more inspiration for you using Oak House Studio's great stamps and inks. It's called  Apache Blessing

Products required in the making of this card include :


Green Oak
Sepia
Triple Meadow Greens
Triple Sky Blues
Triple Sunshine Yellows

Stamps required :


Clear Embossing Powder
Versafine Onyx Black Ink Pad
3mm Foam Pads
A little glue 
Hexagon Dies
One 6x6 square pre-scored linen card


Taking card and a 5.5 inch die, place the die off the folded side of the card and tape into place ready to cut. 


For the Topper

Cut one piece of the A4 card in two and ink one piece using a soft stencil brush starting at the top with the Triple Sky Blue, blend into the card, next add the Triple Sunshine Yellow allowing it to blend into the blue. Tear a piece of paper to make some hills with and taking the lightest of the Triple Meadow Greens place torn paper at an angle to imitate hills, taking care to leave a small area of white in the centre valley. As the hills get closer use the other darker colours towards the bottom of the card.


Take the 4.75 inch die and place over the inked card, and stamp the Apache Blessing into the centre, remove the die and emboss with the clear embossing powder. Then replace the die and tape in place ready for cutting.


 For the Frame

Having placed the 5 inch die onto the second piece of card, stamp the blessing again into the centre of the hexagon, there is no need to re-ink the stamp as it is just being used as a guide. Cut the topper and frame now. Remove dies.


  Stamp the Frame

Using 2 of the smallest leaves from the set randomly stamp around the hexagon using both the Green Oak and Sepia ink pads.


Mark the frame ready for cutting using 4 inch die, I used a pencil and marked the frame on the inside of the die.


Here is a photo of mine before I started cutting.


Putting the card together is the quick and easy part, glue the topper onto the folded card, and place foam pads on the inside of the frame. I found it helped before I cut the frame to mark on the inside of it the top of the frame to make it easier when it came to mounting it into place.

This is the finished card.


Thank you for looking 

Love Doreen


Saturday, 17 October 2015

Mixed Media Canvas - Daisies and Rainbows Stamp Set

Hi all

I'm back with my first official post as a Design Team Member and I am really excited to be here as I love the Oak House Studio products to bits. Many of the products I have used will be featured on HOCHANDA TV  -  Oak House Studio have 3 shows:

Wednesday 21st October

11am Roses
2pm Double Daisy
6pm  Best Bits


 Would you like to learn how to make a mixed media canvas? Well I will show you xx


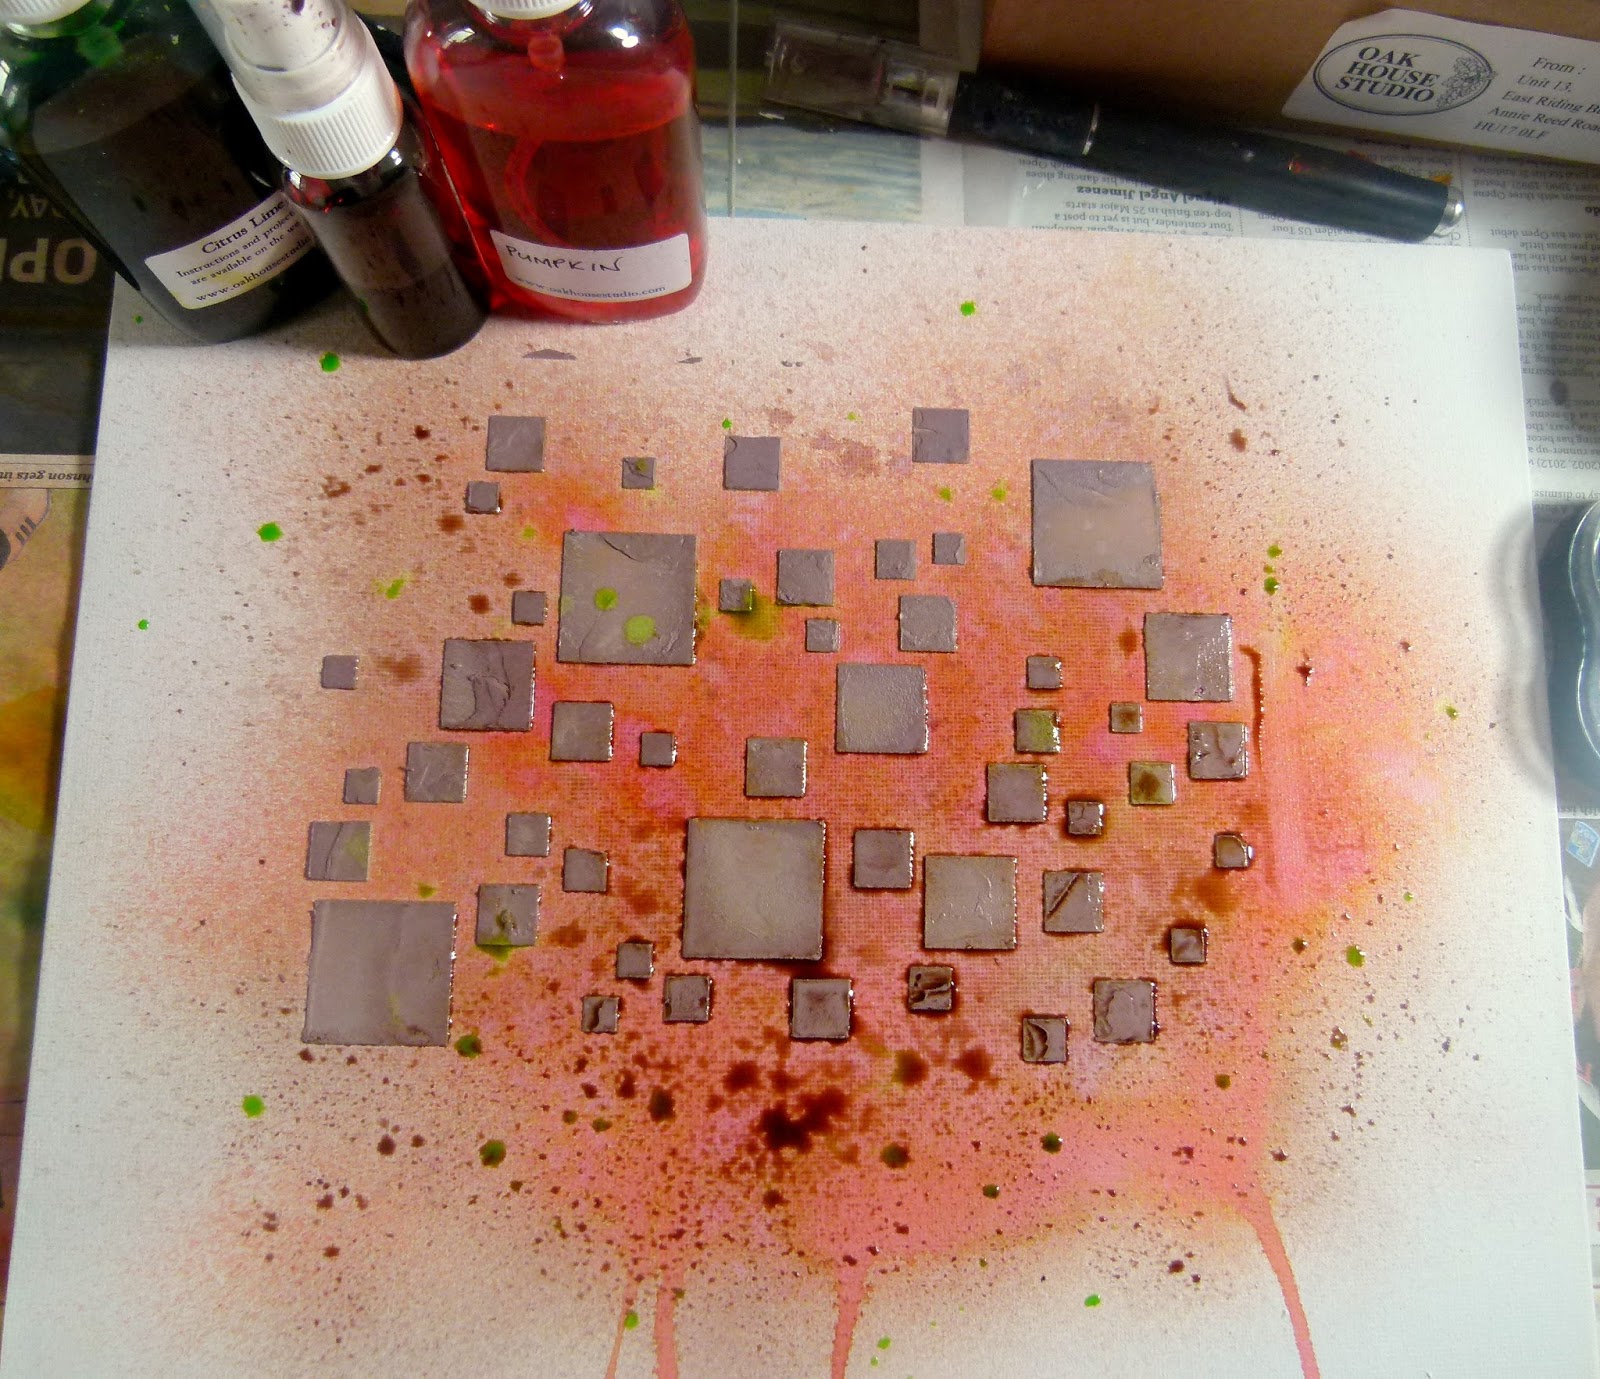
First spray the canvas with Pumpkin Ink In A Bottle and allow some of the ink to run down the canvas.

Oak House Studio Inks In A Bottle Pumpkin and Pure Colour Chemistry Brazil Nut

Mix Brazil Nut Pure Colour Chemistry with some texture paste. Use a stencil to spread the paste onto the canvas.

Add a few drops of Brazil Nut Pure Colour Chemistry to an empty spritzing bottle and add a bit of water to make a spray. Spritz this over the canvas to tone down the Pumpkin ink. Then flick Citrus Lime Ink In A Bottle over the page.

Inks In A Bottle Citrus Green, Brazil Nut Pure Chemistry

Next using the Square Grid Stamp apply Triple Vintage Browns ink to it and stamp around the canvas randomly. Next using the Sunshine Sentiment and Textures set, stamp around the canvas using Golden Oak ink. I then took one of the stamps from the New Daisies and  Rainbows stamp set and stamped that at four points on to the canvas.  The new Daisies and  Rainbows stamp set will be premiering on Hochanda as part of an exclusive bundle.

Daisies and Rainbow Stamp Set

Now its time to get the paper layers built up. I matted the photo onto patterned paper first but did not stick it down as  I wanted to place all the paper pieces in the right spot first.


I used a selection of die cuts and trimmed strips of patterned paper to make the layers. I placed them so that I wouldn't cover over the stamp work as I wanted that to be part of the texture.


Its time to add the embellishments. If you do not have any to match the colour scheme then alter them with ink !!. I used cream paper roses and spritzed them with Citrus Lime Ink In A Bottle and then Brazil Nut to get an Autumn green. I would recommend covering the entire workspace with newspaper including the wall.


I used the quotes as the title by stamping them onto the board using black ink. If they do not stand out very well then stamp onto Stamping Card and spritz with ink. I tore around the edges so it blended in better. This stamp is also from the New Daisies and Rainbows Set.


Don't forget to watch HOCHANDA on Wednesday - the first show is at 11am. 

Thank you for visiting 


A wave from me...

Hi there, Nikki here.
I have loved playing with some of the amazing products from Oak House Studio as part of their design team.  So many things that you can create with good quality inks and stamps....

So, a little about me...... I live in Scotland just outside Edinburgh with my two mad rescue springy things..... I just adore my pupsters. And, if a beautiful part of the country that I stay in, very inspirational.  I work part time as a support assistant in a local high school and I teach and create crafty things the rest of the time.

I love all things inky, so getting to play along with the Oak House Studio dt has just been great!

Here is my first card that I wanted to share with you,

 By masking off some of the card, then spraying ink... you can create a colourful strip for the background of your card.
 I sprayed Jubilee Red onto some cream card stock and then stamped onto this the leaves from the Bumper Winter Leaves set.  I stuck the leaves together and added a lemon layer to create this flower. Really easy to do and very effective.

Keep popping back to the blog to see what the others have been making and creating.
I'll be back soon with a tutorial to share with you.

Until then
Happy Crafting

Nikki x

Friday, 16 October 2015

Waving Hello


 Hi all

My name is Katie. Here is a little bit about me and a few makes using Oak House Studio products.

 I am from Birmingham. I have 4 cats who are very bossy and I have discovered that they are attracted to empty boxes and that's how I keep them off my craft projects !!.  My favourite colours to work with are blues and greens. I love sci-fi and comedy movies and I believe laughter and creativity heal the soul xx.

I am thrilled to be joining the Oak House Studio Design Team. I specialise in mixed media and love getting messy with inks and stamps.

Crafting is therapeutic for me and it helps me to forget the everyday worries. I have been crafting for over 10 years and started off creating simple scrapbook pages and grew from there.


My style is mixed media, messy and with lots of colour. I don't plan my projects I just play with the inks and see what happens next. Here I combined French Lavender with the Citrus Inks In A Bottle and used a selection of texture stamps to add depth to the page.


 I love all things nautical so when I spotted the sea shell stamp set I had to order them. They were my first stamps from Oak House Studio and I have been back for more since.

I created the background by spritzing Vintage Blue and Tempting Teal over the page. I then stamped the sea shell and sea life stamp sets across the page and used Blue Jeans embossing powder on them to make them 3d.

Which is your Favourite stamp set?


I love this stamp as its very inspiring.  I used the  music script stamp on thick white  paper and cut it up to create the layers. I added glow in the dark stars so it would Twinkle at night.

So now you know me and my crafting style - I will be back on Sunday with a tutorial.

Katie xx

Sunday, 4 October 2015

New design team and more good news

A massive thank you to everyone who has applied to be part of our design team. I was amazed at the quality of work in the applications and some applicants will be getting to join us in the future.
I have chosen people who showed they knew about our products and love them. The  new team will be introducing themselves over the next few days.

Our other news is that we have been asked to join with the people at Hochanda in bring you craft products and hopefully lots of inspiration to see you all being creative in your own way. We have our first date pencilled in for later this month and I am pretty busy getting the products in place for our first TV shows in several years. We will be bringing you some Oak House Studio classics, some designs that have been circling my desk and class for a while, and I have been drawing new stamps...


So this is a big WATCH THIS SPACE!.......new stamps and new inks......


Thursday, 24 September 2015

Design team call

Wanted crafters who love to use stamps in their projects.
As soon as I started stamping I became fascinated with how versatile they were and how many different ways they could be used. No surprise that I went on to start to designing stamps and create my own stamp company. I am again looking other crafters from a range of backgrounds and crafts to join a design team. Requirements include:
  1. Commit to 4 months involvement with the team. October to January.
  2. The ability to produce 3 projects for each month.
  3. Ability to produce samples for retail shows and TV shows on tight deadlines and post them to us.
  4. Good photography skills for taking pictures of your projects
  5. Projects posted with social media: Facebook, your personal blog, Oak House Studio Blog
  6. Participation in our blog, including writing your own posts.
  7. Participation in this year’s one stamp event. Details of last year can be found on the website. The provisional date for this year is 31st October, but you will have your kit in time to make ahead of the date if need be.
  8. Promote Oak House Studio products and challenges as widely as possible.
Does that sound fun?  If it does, it’s about to get better.  Here’s what I’ll do for you in return:
  1. The stamps, plus inks and embossing powder sent to you in advance.
  2. BONUS parcel chosen by YOU to be sent out on completion of the 3 months.
  3. Link from our blog and Facebook page to your personal blog
  4. My undying gratitude and amazement for your creations
What do you need to do to enter?  That’s easy too!

  1.  Submit photos of 3 of your most favourite projects that highlight your own personal use of stamps, and links to your blog or gallery to oakhousestudio@gmail.com (Projects do not need to use Oak House Studio products, but we’d love it if they did!)
  2. Submissions must be received NO LATER than Thursday 1st October 2015.
  3. Write up a quick bio about yourself, mentioning why you’re interested in being on the DT, what experience (if any) you have with DTs, and why you love stamping. Tell me about the groups you belong to and any classes you attend or teach.
  4.  Wait impatiently as I collect the submissions and choose who I can use for this project.
  5. I will keep your details on file and will contact you if I think you may be able to help us with design team work in the future
  6. There is no six but somehow I can't delete it!!