Thursday 15 November 2012

Christmas Decoration using Decorative Diamond stamp.

I posted photos of this a week or so ago on facebook. I have to admit I am on facebook much more than my blog, how naughty am I. It would seem I am too chatty for twitter and too lazy for blogland. I promised I would write up the directions for this and it has taken me some time to make another and take the photos. I wish you could all just drop down the studio then you could pull up a chair and have a brew whilst I told you all about it. If anyone is in the area I have an open day at the studio on the 25th November 11 til 3pm and will be doing free make and takes.
 Please call in for mince pies and mulled wine.

Stamp and emboss 25 decorative diamonds.
I used versamark and silver detail powder.
You can squeeze them in quite nicely.
Cut out all the diamonds, No extra bits needed with this design.
start by working on sets of 4 pieces.
Fold THREE of the pieces down the centre line with a valley fold.
The fourth piece is left flat.
Apply glue to one half of one diamond.
I have used PVA glue to give me plenty of time to get a good alignment.
Use this to attach the next folded piece.
 Then add the third folded piece in the same way.
One all three folded pieces are glued together, glue the flat piece across the back
Take time get this set of four lined up as carefully as possible.
Repeat until you have 5 sets of 4 . You should have 5 bit left over.
Now use a spare piece of paper as a base to glue these all together.
I have used a 2inch circle punch but it will be hidden so that is not essential
 and I probably wouldn't have bothered it I wasn't taking photos for you guys.
Glue your first set with the broadest point as close to the centre of the circle as you can.
Gradually add all 5 sets you have made to create a circle.
I have used the final 5 diamonds to cleverly cover the back
 and somehow can't find the photos of that bit so part two will be tomorrow 


Monday 24 September 2012

sneak peek at wine box workshop


I have spent a few days trying very hard to catch up with a few things back at base and haven't really been at the studio for over a week. I popped in there today to simply think about where I am and what needs to happen next. Before I knew it I had started on one of the wine box storage units for the class on 20th October. I couldn't spend very long on it and it will have loads more do to it before it just how I want it but felt the need to see how the products fit in it!! what do you think?
If you fancy joining me on this class check out the website where you can book your spot.


Wednesday 19 September 2012

Not a brilliant image, but loving this quick and simple card. I generally need quick cards at Christmas so I have created this wreath so it take just 2 images stamped 4 times each to create the basic wreath. I did stamping this on cream stamping card, but as I said not a brilliant image.
I have used Forest Green for the holly and Spring Green for the ivy, although the Spring Green pad was looking tired and dirty from lots of classes. I will re-ink it and bring it back to life, but it worked so well for this card I resisted the urge to do it yet.

Sunday 12 August 2012

Just a quick one

Just a quick oneSorry very little time to post at the moment but the final versions of the rose stamps have arrived safely. I just squeezed in enough tome to stamp them up to give you an idea of their final size. The larger one is very much the same size as the clematis stamp and needs a 4x6 inch block.
I have stamp and embossed in Gold Detail Powder then quickly painted in the flower with gold acrylic ink. I used a piece of the new cream stamp card in my favourite size 15cm and 30cm just folded in half to make a 6 inch square card.
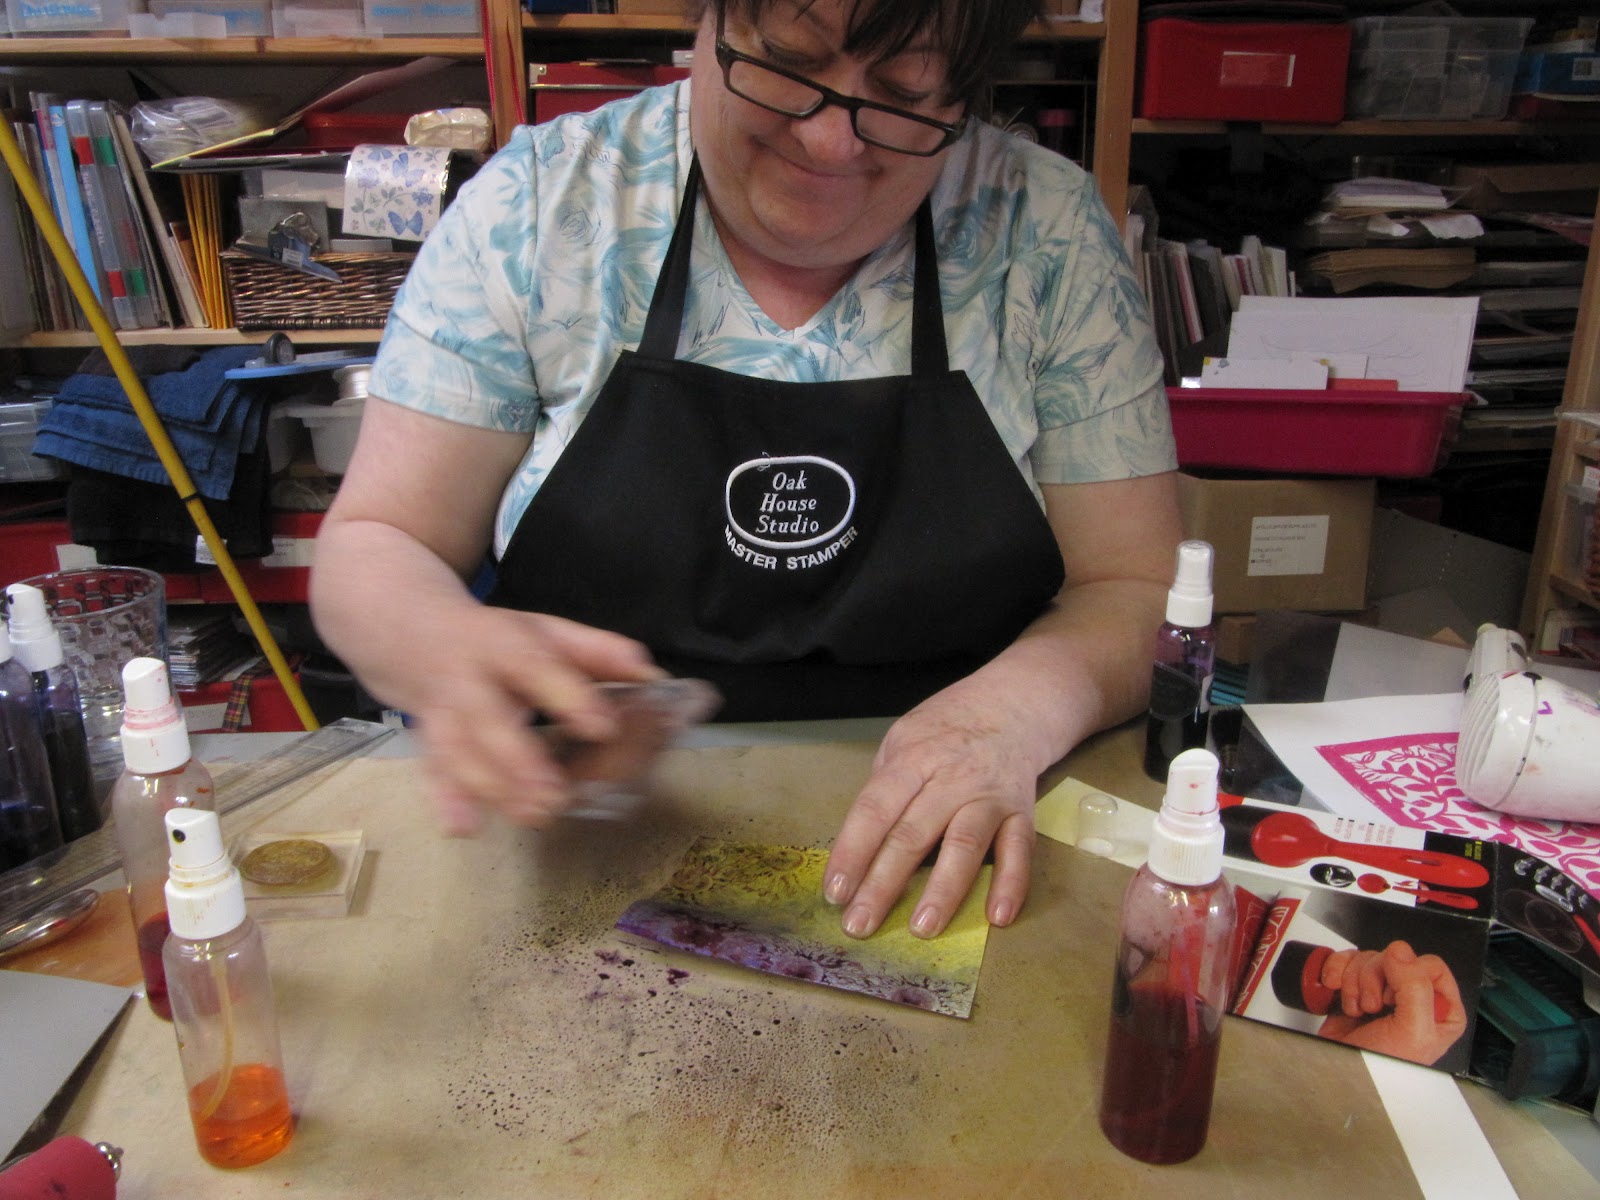
The smaller image is on an ATC of white stamping card sprayed with Lime, peacock and Spode blue Colour Chemistry. Stamped in Midnight pigment ink, flower coloured with ink from the same ink pad and a water brush the leaves with a dark green ink pad (I can't remember which one but probably Forest green).

All three stamps will be available from Great British Craft Show. They will be available to pre order from the website before then. Orders will be dispatched on Tuesday 22nd August


Saturday 4 August 2012

Whilst I still have the services of Ben I thought I would add some more about the  Colour Chemistry Inks. Some how having a screw top makes these other uses that bit more accessible and less faff. So dig out your messy may or even buy a new one and lets get some fast painting done.

Pentel Waterbrush with a  fine tip. Also available in Medium and broad plus a 3 brush set.
The nylon tip come to an excellent fine point, great for detail.

the brush unscrews for you to add or....

among other things you can add ink,
obviously I chose Colour Chemistry in a bottle.

The pipette goes inside the pen so no mess
even with my shaky hands.
The  pipette is ideal for transferring ink the bottle
to your pen or a palette.


Precious purple ink in the brush,
I have only added a small amount,
 but this is enough to paint several flowers.

Altering the pressure on the brush changes the size of the
point.


The ink flows quickly allowing you to colour fast.

Colouring in the the stamped  image
is pretty easy now


I enjoy painting but sometimes you want to be a quicker. This method certainly is.

These are new stamps they are not on the website yet, but I would be interested to know what you think of them. We should have some stock by the time we go to Donnington Park in a couple of weeks so whose going?

Friday 27 July 2012

Colour Chemistry in a Bottle

Here are some photos Ben took at a recent Open Day of me just playing and showing just a little of what you can do with the Colour Chemistry Inks. The possibilities are endless.

The height you spray from will change the type of outcome you get.

The closer you spray the more intense the colour and wet you get your project


Spray from about 6 inches (15cm) above the work to get a gentle mist.


If you can't wait for it all to dry, employ your heat gun

As it dries, you can add more colour.


Then dry again

Is this me using Purple and Yellow??

And now time to get stamping
Tap your stamp into all that surplus ink laying on your hot and messy mat.

Keep tapping till you think you have enough ink on your stamp.


stamp on to the card and repeat


LOVE IT!

still got some ink left, well find a tag or something to stamp on too.


Oh yes and why not try it on some of our cream stamping card?

hmm loving that too!


At this point I did clean my messy mat, but could have done lots more.

Well hope you liked this quick session on just some of what you can do with our products. The stamp I used was the medium Sunflower. The inks I used where Precious Purple and Citrus Lemon. We also sell tags, stamping card in cream and white 250gsm and of course Hot and Messy mats in two sizes.