Thursday 30 October 2014

Big Christmas Collection Christmas Card With Stamps from Oak House Studio.

Today's card  for Oak House Studio features 2 sets of stamp collections, the Big Christmas Collection and the 2 inch Journal Circles set.  For the background I used a mixture of regal claret, citrus orange and totally turquoise from the ink in a bottle range  and sprayed onto a glossy card.  The background was made on a A4 size card and I cut out this square as the colours worked well with the Sea Blue ink pad .  

To start with the construction of the card I stamped the dotted frame circle onto my background square.  Then I stamped the solid snowflake bauble from the big Christmas Collection onto white card stock with the sea blue ink.  I cut this out using a 1 inch circle punch (you can just cut around the bauble if you don't have a punch).  I then glued this to a flattened bottle cap, let it dry and then added the clear bubble dome on top.  I then applied this to the center of the stamped frame - if you score the back of the bottle cap with a scalpel it will help to adhere the cap to the background.  the corners are then stamped using the open snowflake bauble in the 4 corners of the background.  I've mounted the whole thing onto a coordinating paper from my stash of scraps.  To balance the whole card I added the words "Let it Snow" from the Snowflake collection.


Have a great day 
Anita


Tuesday 28 October 2014

New Firework Stamps for the borders and frames challenge

A lovely project from Doreen using the new Firework stamps and the Block frame that we have recently released at Oak House Studio.


List of ingredients :

1 piece of black glossy card
1 piece of Acetate
Versamark ink pad
Selection of mica powders
Colour Chemistry Acrylic Inks, Citrine, Malachite and Silver
Double sided foam tape
Black Fine Line Marker Pen
and Fine Line White Paint Marker

Firstly stamp the frame onto the Acetate and leave to dry.
Next take the black glossy card stamp fireworks randomly using the versamark.
Using a dry paint brush take the mica powders and lift a little of the colours you have selected and tap a little of each colour in no particular order over the stamped  images. Then using a very soft brush dust the colours over the images to colour the fireworks. Tap off the excess powder and buff with a soft tissue. 

Returning to the frame I used a white fine line marker to colour the frame and leave to dry completely once again, when done apply the double sided foam tape and cut of the excess acetate from the frame. Choose an area of the firework artwork that you are happy works in the frame and stick the frame to it. Cut the excess black card off so it is not showing outside the frame.
Take a card of your choice and stamp with Archival ink (black) Then write in squares Remember, Remember the fifth of November.
Next take the Acrylic Inks and shake the silver well and put a little onto a white tile, then a little citrine add some of the silver and colour the empty squares. Then I added a little Malachite to the citrine and silver to make a very pale shade of green and then graduated the colour all around the card using the 3 inks. 

If you go over the black of the frame don't worry as when you go over the letters again in the black fine line marker you can colour it back in. 

Mount the frame onto a piece of card from your craft stash and stick to card.


Thank you for looking, I hope you are feeling inspired and will come and join us in the challenge on Facebook.

Love Doreen


Saturday 25 October 2014

Upcycled beer mat with the Square Borders Stamp and ink sprays

Morning all. Here is a little coaster I made for my craft table by up-cycling 
an old cardboard beer mat. Great fun, I loved making it.
Products used:

Cobalt Blue pigment ink pad and Clear Gloss embossing powder
Gesso, scraps of white card and a magazine page
Black and white pens and a charcoal pencil

I painted the beer mat with white gesso, and once dry, I sprayed with the inks. 
I stamped and embossed the border around the outside of the mat and wrote inside some of the squares. 
I then cut out two hearts to fit the space in the middle and again sprayed these, then drew dots around the larger heart with a black pen. 
I stamped the border onto white card and wrote letters inside the squares, then cut out the squares which was really easy, and glued the letters inside the heart. Very simple but good messy fun! 

I adore the Square Borders stamp as it is a fab size for writing in or drawing little flowers, circles or whatever else you fancy! 

If you'd like a more detailed step-by-step, including how to create the texture,
 have a look on my blog.
Hope you have fun with  Oak House Studio products. Suz xxx

Thursday 23 October 2014

Through The Window On A Winter's Night


Hi everyone, today I have a Christmas card made with the Block Frame stamp (the empty version of the Christmas Frame) which I cut out and used as a window looking out onto a night time winter scene.  The empty block frame is so versatile, cut out the panels to create a window as I have done,  fill the boxes with designs, or cut out the panels and outer frame for reconstructing when stamped.


I used the bolck frame,  Christmas blessings sentiment  and the tree beech and tree oak stamps for this card, and here is how it was put together.  Start by stamping and embossing the frame with detailed embossing powder onto a fairly large piece of card.  Cut your piece of card to size to fit on your card blank and cut out the panels in the frame to make your window,  use a sharp craft knife.

Create your inky scene onto a separate piece card which can be trimmed to size to fit behind your window.  Place a circle of paper where you want the moon and colour your background with inks, I used distress ink and a blending brush,  Oak House Studio pigment inks work wonderfully too.  The trees were added to the scene using slate grey pigment ink. The frame was added to the scene panel and this was placed  over a co-ordinating piece of blue card using 3D sticky fixers.

This card is easier than it looks, you can draw or ink the background scene, or use stamps, stickers and die cuts the choice is yours.  We would love to see what you come up with, don't forget the challenge for frames and borders is open until the end of the month so there is still time to get your entries in.

Sylv xx

EDITED hi Lynnda here, just to say this is one a many cards that have been made with stamp, and so we are starting a 101 cards album for it on the Facebook Inkspired by Oak House Studio group, come and join us. 

Wednesday 22 October 2014

Framing Christmas .....

Framing Christmas ....

I used only permanent inks in the making of this card.
Firstly using liquid inks on a blending tool with a felt pad. I chose 2 inks that I like, then randomly stamped the pad all over the acetate.


Then taking the stamps of my choice from the oakhousestudio Big Christmas Collection and using an Archival Jet Black ink pad stamped over the top of the dry ink, allowing it to dry slightly before taking a dry cloth or tissue and wiping the ink off.


Next step was to turn the acetate over and decorate the front using stamps from the Christmas Wreath set  and Wishing you a Merry Christmas sentiment.
Use the Stazon ink pads to stamp the front of the acetate.


I have used the permanent ink technique before but until a couple of days ago had never stamped on the same side as the inks before wiping off but all credit to Kim Reygate for sharing this idea on Facebook. I love the effect it gives and hope you do too.

Thank you for looking

Love Doreen


Oak House Studios - Frame and Border Challenge

Hi, it's Clare here and there is still time to get your craftiness in action and submit your entry for this months challenge. Remember you are in with a chance of winning one of five prizes and all you have to do is create something using one of Oak House Studios fantastic products.

For my final bit of inspiration I have used the Oak House Studios extremely versatile Block frame stamp.


For this card I have used:
Big christmas collection (Holly & berries)

First of all I stamped and heat embossed the frame and the sentiment with Oak House Studio's gold detail embossing powder. After that, out came the trusty post it notes to carefully mask off the small rectangles and stamp in the hollow ivy leaves. A few more sticky notes later I masked the frame and stamped the solid ivy leaves around the outside of the frame.


I look forward each month to see what everyone else has been making. There has been some super cards made already this month so come on, what are you waiting for? Get your entries in while there is still time!

Happy crafting,
Clare x x x

Let It Snow - Using Snowflake stamps

I think we can safely say the 'C' word now that we're half way through October and the nights are drawing in and the fire is on and you're nice and cosy in your own little world - have I convinced you yet?  No............okay maybe my little snowflake card will.

So for this card I've used the Snowflake collection stamps.  I arranged ALL the snowflakes randomly onto an acrylic block and then stamped it onto white card with the sea blue inkpad  - if you're making a lot of cards with the same design then I would suggest stamping onto a bigger piece of card - I used a postcard size card.  

On the back of the stamped card I drew a heart - you can of course use any design, shape or size - a star would be great or even a snowflake.,  Cut your design out and put to one side while you create your background.

For the background I used the paper I used to clean up my gelli plate with and clean any extra paint from my roller.  Cut the background to the size you want and then using a clear pigment ink I stamped the larger of the snowflakes along the top and bottom of the paper and then embossed with white embossing powder.  I then mounted this onto some white paper and added a bit of colour with the sea blue inkpad.  

Everything was then glued together before adding to the main card. 

So have I convinced you it's okay to say Christmas?  I hope so. 


As an extra treat I thought I'd share my creative area.  You can see the stamps on the acrylic block and how I had them set out.  There are some of the acrylic inks and my box of the pigment inks to the left. These all live permanently on my desk - if you look closely you can just about see the bottles of ink in a bottle.

Why not come and share your creations on our facebook page Inspired By Oak House Studio

Happy Creating 
Anita

Tuesday 21 October 2014

Borders and Frames .... The Beautiful Rose and The Harlequin stamps


The Beautiful Rose and The Harlequin....


This is a fairly simple card I just used a large post it to mask off the centre of the card then taking the Colour Chemistry ink pad in Sea Blue and taking The Harlequin stamp and using the main stamp fill in and match up as much as possible then fill in the gaps with the single diamond.

Take the Beautiful Rose Stamp and stamp into the area that was masked off with the post it then using water and a very fine brush drag in the colour from the inked image. I used the Colour Chemistry Dusky Rose and Green as Grass ink pads  for this adding more colour with the brush straight from the ink pad if  I felt it needed a darker shade.

To finish use a fine line marker to go round the inside edge of the Harlequin frame. I did this by eye using a wiggly line, finally I added a couple of paper roses. 

Thank you for looking 

Love Doreen

Monday 20 October 2014

Happy Birthday Border


Hi Sylvia here with another Frames and Borders Challenge post.  Today I have a very quick simple CAS card for you.


I used a white linen top fold card blank and stamped a border using the Four Candles stamp.  The stamp was stamped again onto a scrap of white linen card and the shorter candle coloured with vermilion pigment ink, the flame with lemon yellow and golden yellow pigment ink.  The coloured candle was cut out and placed over a matching candle with a sticky pad so it would be slightly raised.


The Script Sentiments happy birthday was stamped under the border.  I wanted a little more colour so I added a thin border of red card to the front.

It's over to you now, lets see those frames and borders cards entered into the challenge, visit the inkspiredbyoakhousestudio facebook page for more details and to find the folder to enter your cards into the challenge.

Friday 17 October 2014

Oak House Studio - Gingham Frame

It's Clare again this time with a frame. I wanted to showcase some of Oak House Studios fabulous ink pad colours. The rich creamy colour lifts off the pad and kisses the the card perfectly. Although this is a christmas themed card I have chosen quite contempary colours, all considered.

For this card I used:
Gingham border stamp
Christmas baubles from the Big Christmas Collection
Deck the halls stamp set
Orchid colour chemistry ink pad
Sea blue colour chemistry ink pad
Dusky pink colour chemistry ink pad
Purple colour chemistry ink pad


I started off by stamping a whole square of card with colour chemistry orchid ink pad and then put through my die cutting machine to make a frame, setting aside the centre piece to stamp my sentiment. After that I smudged a little purple around the edge of the frame. On a separate piece of card I stamped the baubles in sea blue, orchid and dusky pink ink pads and added a handrawn piece of string so they appear to hang. With the spare piece of gingham which was from the centre of the frame I cut another square and stamped on my sentiment and then gently sponged the purple ink pad around the outside and added some faux stitching with my black pen. Once the card was assembled I added some glossy accents to the baubles and a little sprinkle of glitter.


I hope that I'm not scaring you with christmas cards already but pop on over to Oak House Studios online store to have a look at the many lovely christmas stamps. They really are quite versatile with some of them being very generic so you can use them all year round.

Don't forget to submit your entries for the challenge. Remember you only have to use one of the Oak House Studios products to be in with a chance to win a prize.

Happy crafting,

Clare x x x

Thursday 16 October 2014

Oak House Studios - Frames and Borders Challenge

It's Clare here in the hot seat today and I would like to share with you my latest bit of inspiration for the Oak House Studios borders and frames challenge.

For this card I have used:
A stitch in time (stitch & buttons stamps)
Dress form duo
Creativity never goes out of style
Harlequin pattern stamp
Orchid pigment ink pad
Midnight pigment ink pad
Blue jeans ink in a bottle
Pearly silver embossing powder


I started off by stamping my border, sentiment, buttons and dress form,heat embossed with Oak House Studios pearl silver embossing powder. After that I sprayed my card with The colour chemistry, blue jeans, ink in a bottle. Once dried I randomly stamped the harlequin stamp in midnight blue ink pad. I finally sponged through a mask from my stash, the lovely orchid ink pad.


I hope this might have given you a little glimmer of inspiration. I can't wait to see your entries for this months challenge. Don't forget there are prizes up for grabs! Good luck.

Happy crafting,
Clare x x xx


Tuesday 14 October 2014

101 ways with the Block Frames Stamp

Well now the One Stamp event is over, don't forget October's Challenge is FRAMES and BORDERS - full details are HERE.

I was given the Block Frame stamp by Lynnda and asked to write a post about it.  As the great man himself would say, there are endless possibilities with this stamp......if you don't like faffing then there is a very nice Christmas version (on the right) but I saw the empty frame and thought it was very versatile - add an image, a sentiment, whichever way you like and it obviously frames your work.


You may have seen my clean and simple Christmas card made with the Block Frame - this was embossed with Red  embossing powder and then stamped in each of the blocks separately.  I've used the small Christmas Corner and just watercoloured it with Aquash.   The sentiment is from the Peace and Joy set and 25 from the Numbers set.


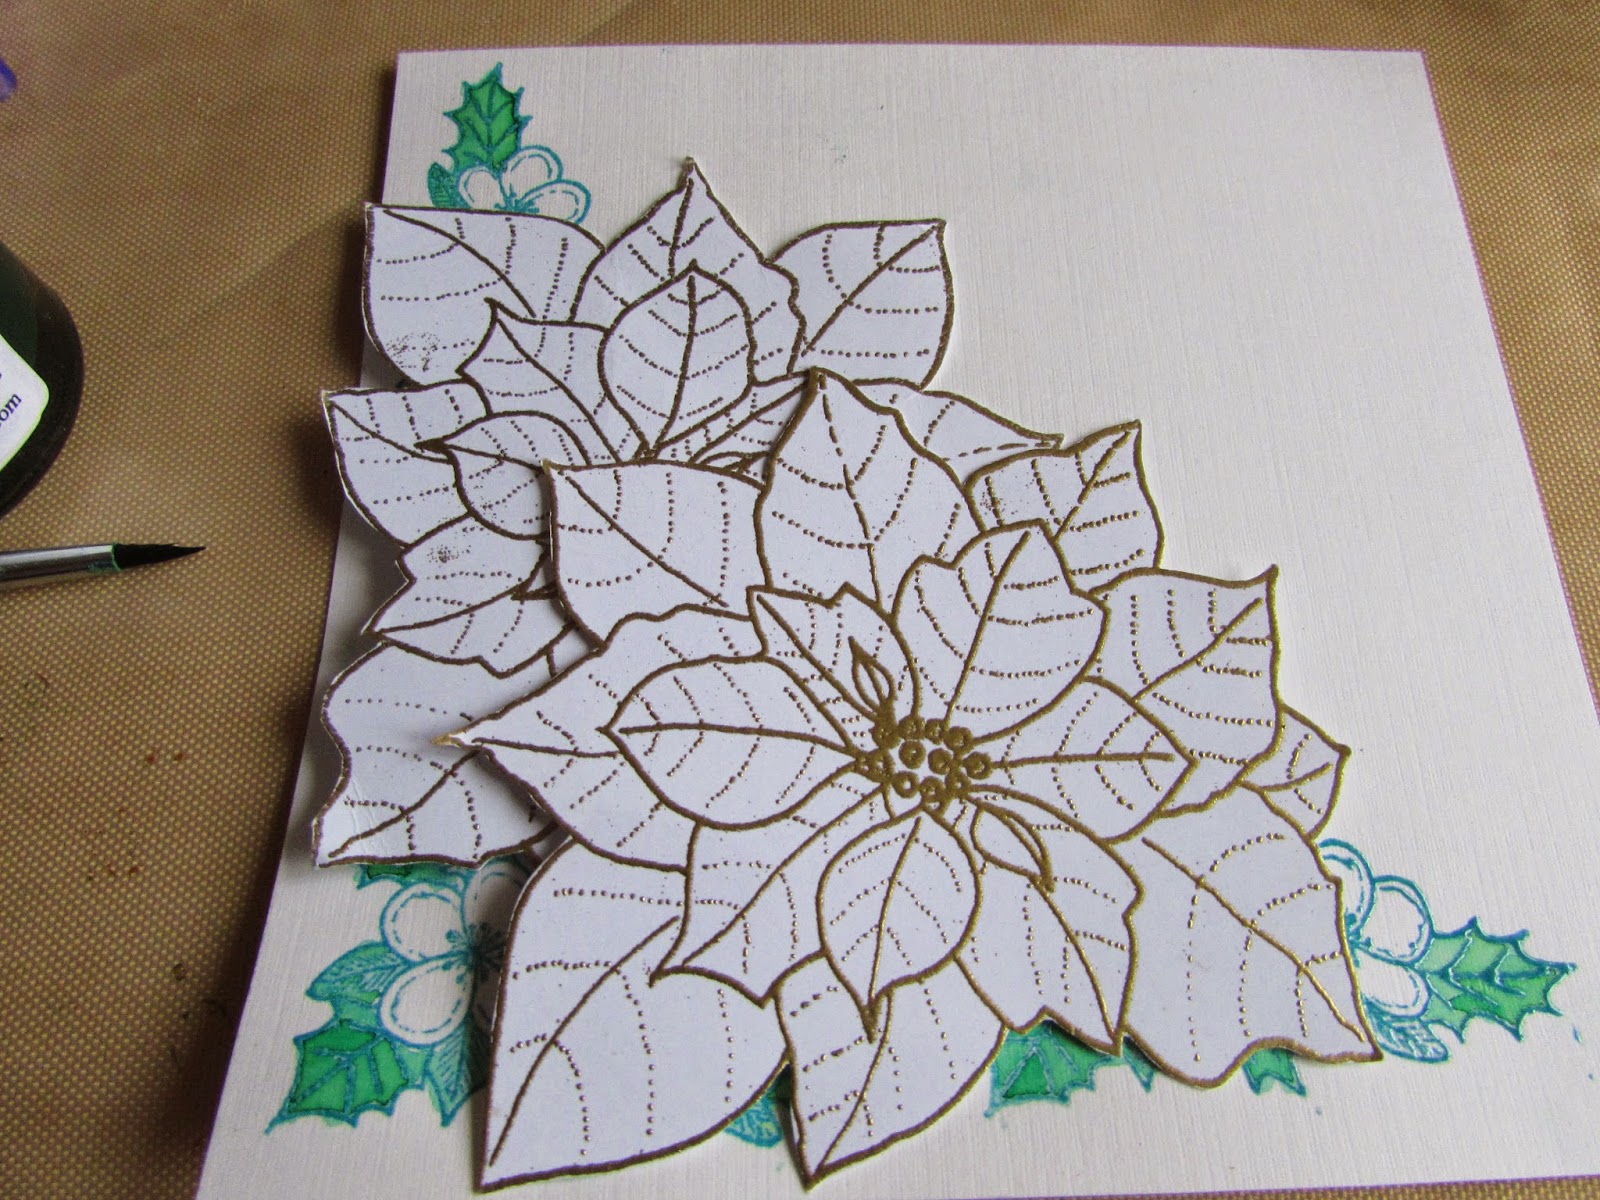
The next card is another Christmas version but this time adding the sentiment in the square box. Before I started on this card,  I stamped the design on some scrap card and then cut out the boxes to create a mask.  


 I began by spraying a mix of Citrus Lime and Peacock Green Ink in a Bottle onto some card and then embossed the Block Frames stamp with gold powder.  Onto this I stamped the Deck the Halls sentiment and some Holly leaves from  the Big Christmas Collection set - both in Green as Grass Pigment ink.  I then used my mask to stencil a little Forest Green Pigment Ink around the sentiment.  The Holly Leaves outline is gold embossed and then painted with Emerald Acrylic Ink.   The Baubles (again from the Big Christmas Collection) are gold embossed onto some red card sprayed with Glorious Gold Ink in a Bottle and I've highlighted the stars with Ruby Acrylic Ink.  Its just finished with the red beaded berries and gold thread.


This next card has a more wintery feel.  I stamped the Block Frame and a couple of Snowflakes and embossed with Silver embossing powder.

Over this I sprayed Blue Jeans and Totally Turquoise Ink in a Bottle and then added more Snowflakes and Let it Snow with Midnight Pigment Ink.


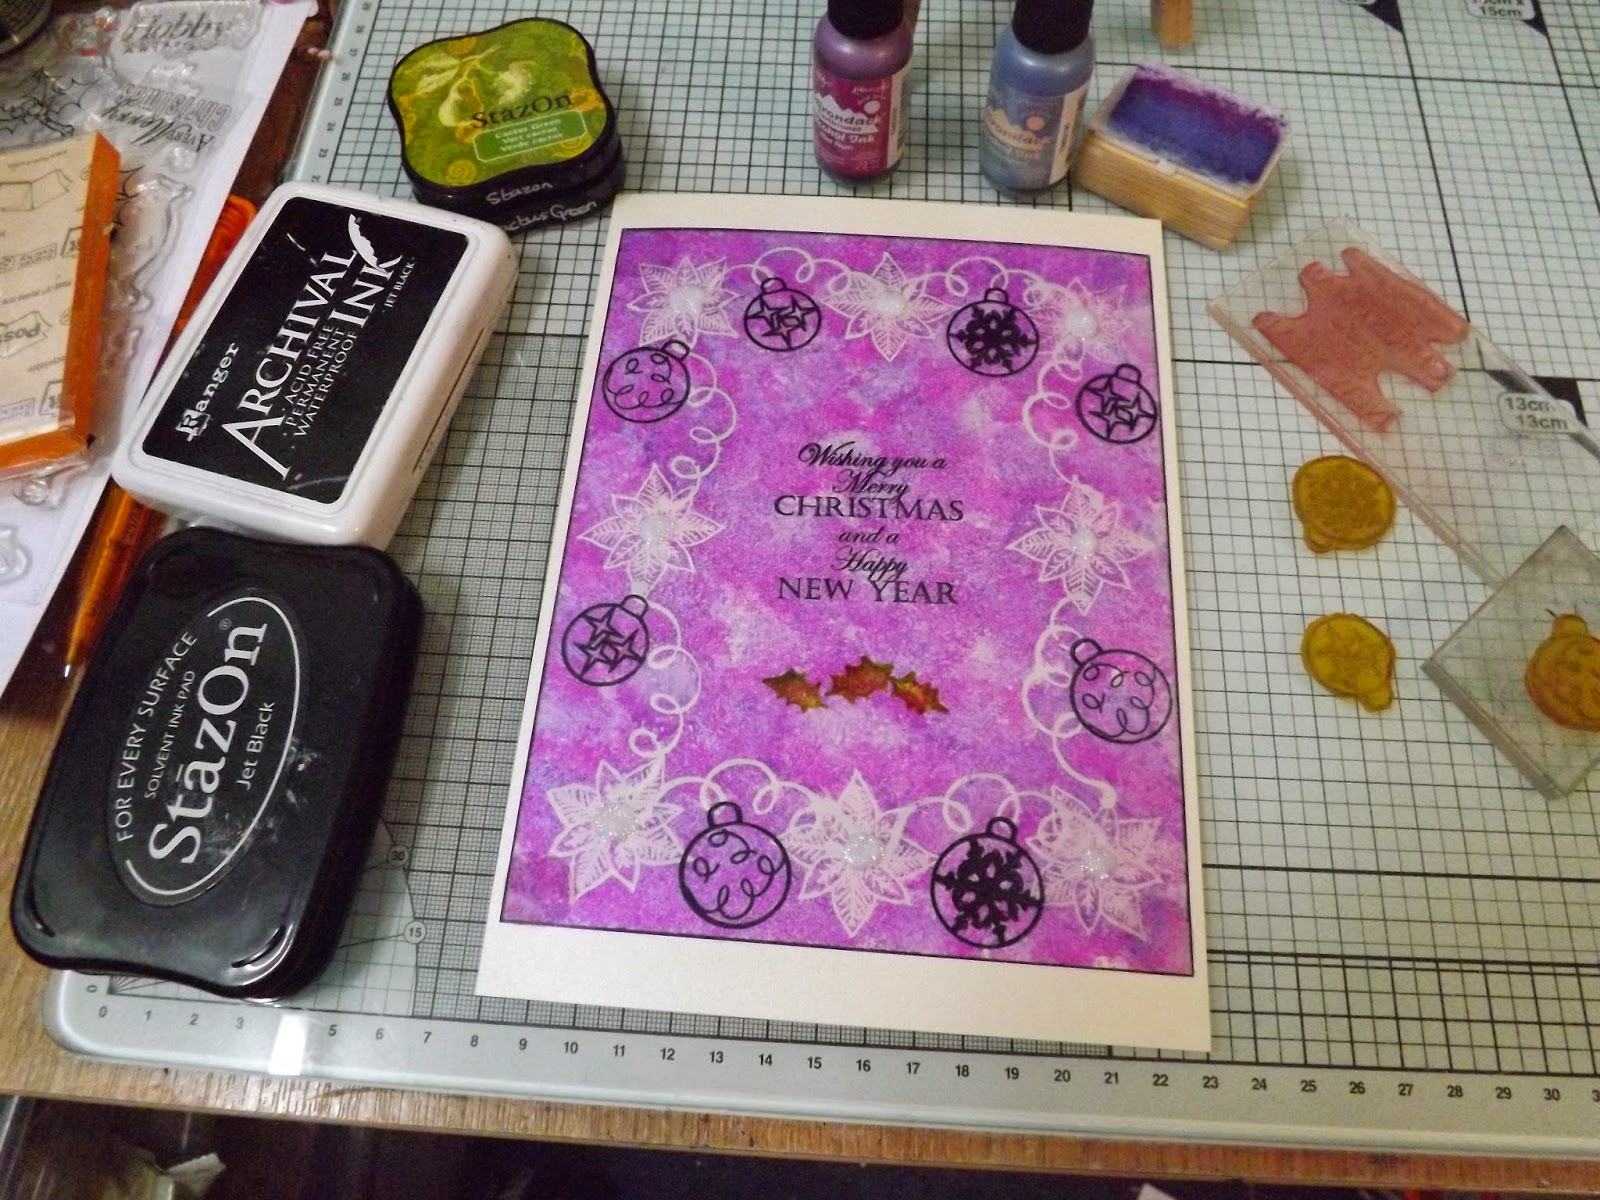
My last card - the Party Invite - is completely different but still uses the Block Frame stamp.  I started by clear embossing the stamp, spraying with Totally Turquoise, Precious Purple and Paris Pink Ink in a Bottle and then ironing off the embossing powder to leave the white outline.  I've just added the Four Candles, words from the Look Who Is set and the Numbers Stamps.


Ok I admit I haven't made 101 cards but I hope you get the idea - you can use the stamp whichever way up you like and for whatever occasion - as they say, it's not just for Christmas!   Thanks for looking and I hope I've given you some ideas for the Borders and Frames Challenge.

Saturday 11 October 2014

One Stamp round up


Well I am not sure where the time went, and I for one have a couple of projects that may have to wait till tomorrow now. Here are just a few images to remind you of the day and say a HUGE THANK YOU for joining in.

It would be no fun without you along to enjoy the day with the design team and myself. Comments will still be entered into the draw up to Midnight on Sunday so let's have a laid back day on Sunday posting the things we didn't quite finish and having a better look at what everyone else has done.

I really believe the stamps that we produce are versatile and I hope today has helped you think the same. We are working on the next event which will be in the Spring but no date has been set yet. It will a full one 24 hours again next time so get ready!


Lynnda xx


One Stamp Another Card.

Add caption
 When I am crafting I think about how I could use the the things on my desk in a different way.
I thought about using the shape of the Christmas Corner to add foliage behind other stamps. A quick try on scrap first then...
15cm white linen square card. 14 cm square to stamp (white linen) so 14.5 cm square- red linen. Two Poinsettias stamped & embossed in Gold on Stamping card.


 On the 14 cm square, I stamped the Christmas Corner three times with Sea Blue pigment ink and used Clear embossing powder over it.
 Quick check the poinsettias to get a rough idea how much I needed to paint.
 Painted the leaves that might show with watered down Malachite acrylic ink
 Checked again then painted the poinsettias with Acrylic Ink, I used Peridot, Malachite and Ruby. Well they were still on the desk.

Hardest bit of the card....letting the ink dry

 Assembled card.
I added a sentiment, but I think I prefer it without.