Tuesday, 27 October 2015

One stamp, three different cards...

These cards were all made using the double rose.....another favourite of mine.
This stamp has both the inside image of the rose head and the outside image of the rose. This gives you a positive & negative effect when you stamp it.


Today my plan is creating some background papers with all my inks..... love being able to spritz and create my own background.
Whatever you are doing, have fun!

Happy crafting
Nikki x

Sunday, 25 October 2015

One Stamp, Two Cards

Hi there, Nikki from the DT here to share with you another couple of cards.
These are a couple of the sample cards for the recent Hochanda show that Oak House Studio did.

 Both backgrounds and roses have been created and coloured using the triple fruity reds ink pad. You can find that one here ...... over on the Oak House Studio shop. While you are there, have a look at the other inks...... I love them all and really think as crafters you 'need' to have them in your collection!


I love the rose stamp and the warm colours of the inks work perfectly with it.
We would love to see what you have been creating with your Oak House Studio products.
Make sure you leave us a comment with a link to your blog post with your project in it and we'll pop on over and leave you some crafty love.

Until next time, happy crafting

Nikki x

Sunday, 18 October 2015

Hello Lynnda

Hi everyone, my name is Elaine, I live in Botley near Southampton. I have been crafting on and off all of my life. I have tried nearly everything from making flowers from a Petal paste to 3 Decoupage. Now I concentrate on card making and crochet.
I have enjoyed making these gorgeous from these amazing inks and stamps and I am very proud go belong on a brilliant bunch of talented card makers.

This is just a taster of what I have made.


Thank you for your support and join us watching Hochanda to see Lynnda in action on this Wednesday coming. xXx

Oak House Studio on the TV

Exciting news!  Lynnda is back on the TV with 3 shows featuring Oak House Studio products so make a note in your diary, set an alarm and please watch.
 
HOCHANDA TV   Freeview 39   Sky 663

Wednesday October 21st

11am  Roses
2pm    Double Daisy
6pm   Best Bits

There are some classic designs plus lots of new stamps, new triple ink pads and Pure Colour inks. Just some of the new designs are featured on this card by Elaine Kettle.


The Pure Colour inks have been used to spray the background, paint the Rose and colour the twill ribbon. The new Rosebud Border looks fab stamped with the Triple Meadow Greens and the words are from the Friends Words set.

The Design Team have been really busy making samples for the show so don't forget to watch and be inspired......... Wednesday 21st, first show at 11am.

Apache Blessing


Doreen here with some more inspiration for you using Oak House Studio's great stamps and inks. It's called  Apache Blessing

Products required in the making of this card include :


Green Oak
Sepia
Triple Meadow Greens
Triple Sky Blues
Triple Sunshine Yellows

Stamps required :


Clear Embossing Powder
Versafine Onyx Black Ink Pad
3mm Foam Pads
A little glue 
Hexagon Dies
One 6x6 square pre-scored linen card


Taking card and a 5.5 inch die, place the die off the folded side of the card and tape into place ready to cut. 


For the Topper

Cut one piece of the A4 card in two and ink one piece using a soft stencil brush starting at the top with the Triple Sky Blue, blend into the card, next add the Triple Sunshine Yellow allowing it to blend into the blue. Tear a piece of paper to make some hills with and taking the lightest of the Triple Meadow Greens place torn paper at an angle to imitate hills, taking care to leave a small area of white in the centre valley. As the hills get closer use the other darker colours towards the bottom of the card.


Take the 4.75 inch die and place over the inked card, and stamp the Apache Blessing into the centre, remove the die and emboss with the clear embossing powder. Then replace the die and tape in place ready for cutting.


 For the Frame

Having placed the 5 inch die onto the second piece of card, stamp the blessing again into the centre of the hexagon, there is no need to re-ink the stamp as it is just being used as a guide. Cut the topper and frame now. Remove dies.


  Stamp the Frame

Using 2 of the smallest leaves from the set randomly stamp around the hexagon using both the Green Oak and Sepia ink pads.


Mark the frame ready for cutting using 4 inch die, I used a pencil and marked the frame on the inside of the die.


Here is a photo of mine before I started cutting.


Putting the card together is the quick and easy part, glue the topper onto the folded card, and place foam pads on the inside of the frame. I found it helped before I cut the frame to mark on the inside of it the top of the frame to make it easier when it came to mounting it into place.

This is the finished card.


Thank you for looking 

Love Doreen


Saturday, 17 October 2015

Mixed Media Canvas - Daisies and Rainbows Stamp Set

Hi all

I'm back with my first official post as a Design Team Member and I am really excited to be here as I love the Oak House Studio products to bits. Many of the products I have used will be featured on HOCHANDA TV  -  Oak House Studio have 3 shows:

Wednesday 21st October

11am Roses
2pm Double Daisy
6pm  Best Bits


 Would you like to learn how to make a mixed media canvas? Well I will show you xx


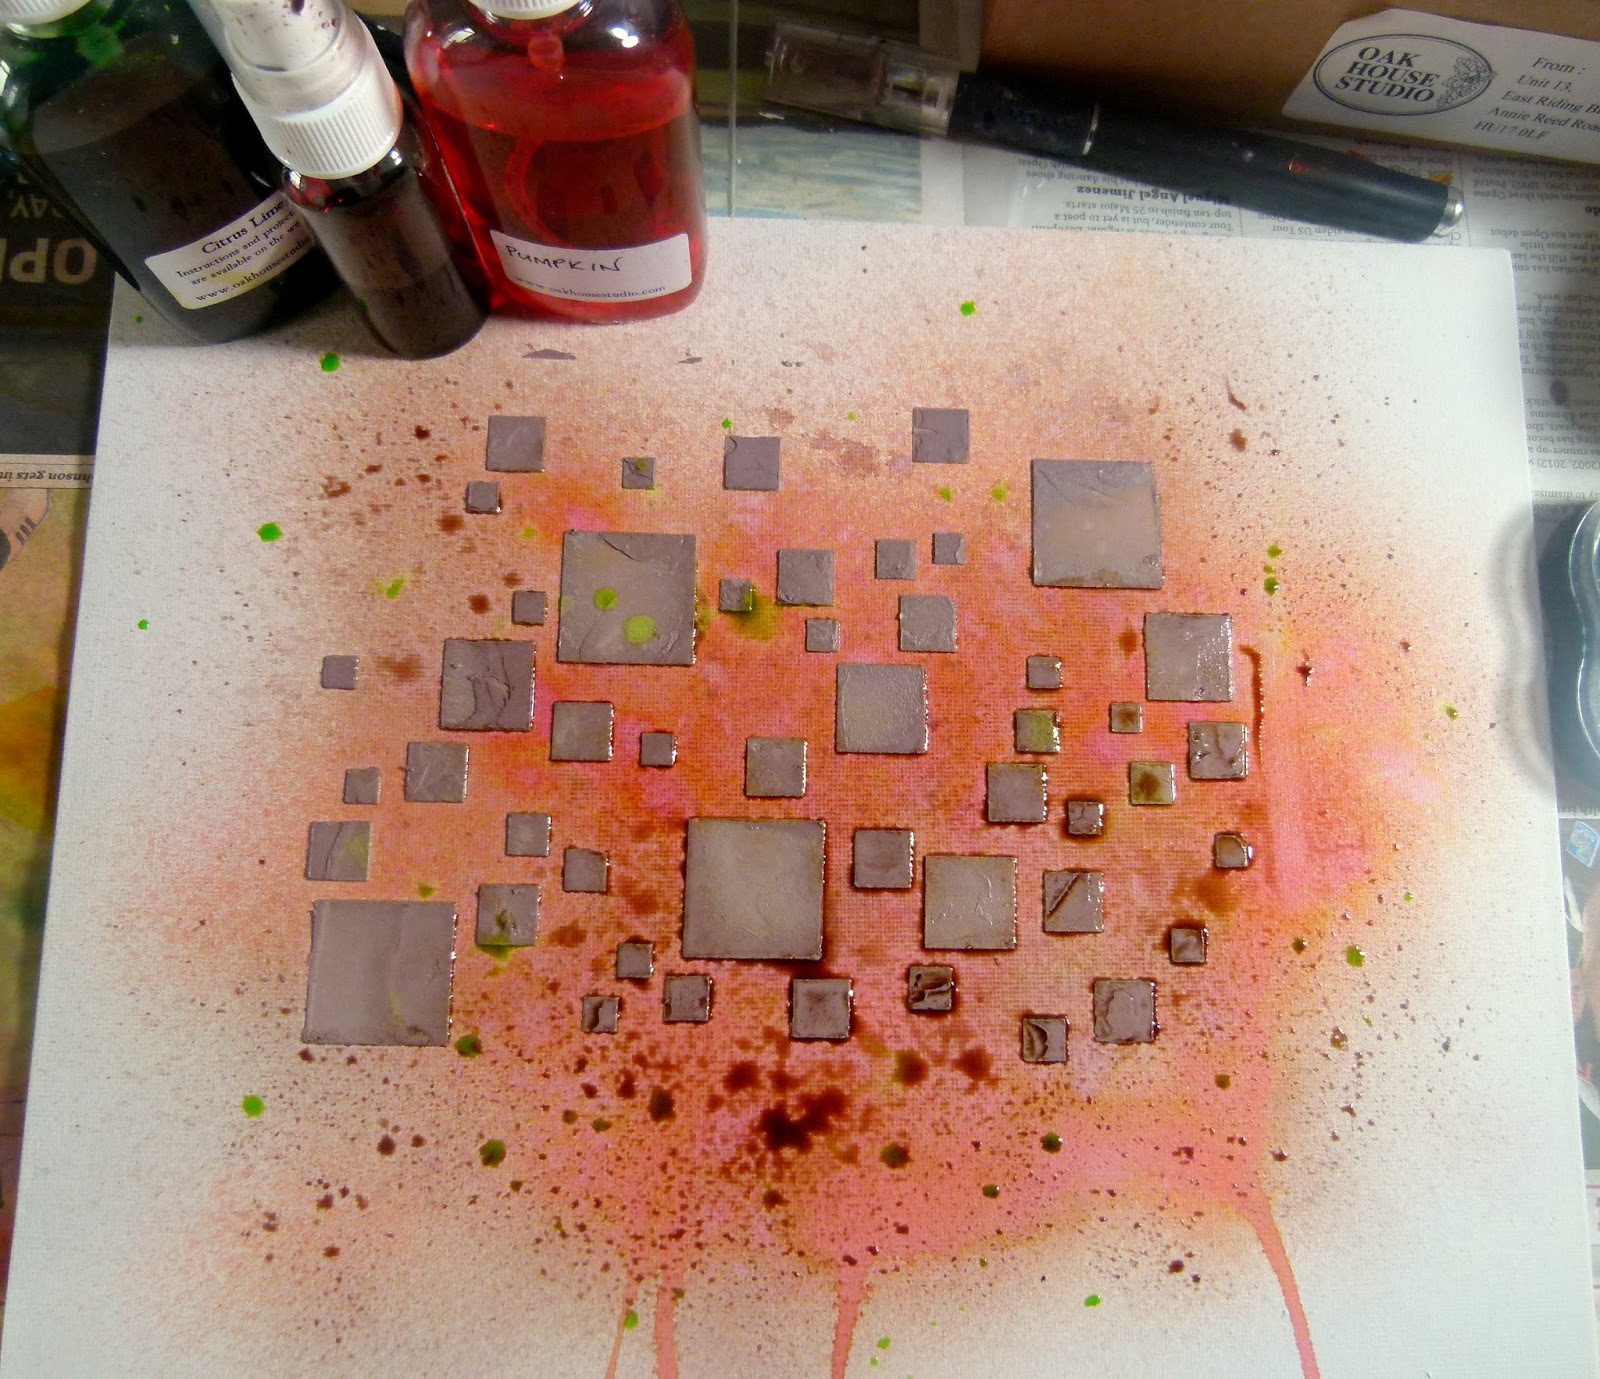
First spray the canvas with Pumpkin Ink In A Bottle and allow some of the ink to run down the canvas.

Oak House Studio Inks In A Bottle Pumpkin and Pure Colour Chemistry Brazil Nut

Mix Brazil Nut Pure Colour Chemistry with some texture paste. Use a stencil to spread the paste onto the canvas.

Add a few drops of Brazil Nut Pure Colour Chemistry to an empty spritzing bottle and add a bit of water to make a spray. Spritz this over the canvas to tone down the Pumpkin ink. Then flick Citrus Lime Ink In A Bottle over the page.

Inks In A Bottle Citrus Green, Brazil Nut Pure Chemistry

Next using the Square Grid Stamp apply Triple Vintage Browns ink to it and stamp around the canvas randomly. Next using the Sunshine Sentiment and Textures set, stamp around the canvas using Golden Oak ink. I then took one of the stamps from the New Daisies and  Rainbows stamp set and stamped that at four points on to the canvas.  The new Daisies and  Rainbows stamp set will be premiering on Hochanda as part of an exclusive bundle.

Daisies and Rainbow Stamp Set

Now its time to get the paper layers built up. I matted the photo onto patterned paper first but did not stick it down as  I wanted to place all the paper pieces in the right spot first.


I used a selection of die cuts and trimmed strips of patterned paper to make the layers. I placed them so that I wouldn't cover over the stamp work as I wanted that to be part of the texture.


Its time to add the embellishments. If you do not have any to match the colour scheme then alter them with ink !!. I used cream paper roses and spritzed them with Citrus Lime Ink In A Bottle and then Brazil Nut to get an Autumn green. I would recommend covering the entire workspace with newspaper including the wall.


I used the quotes as the title by stamping them onto the board using black ink. If they do not stand out very well then stamp onto Stamping Card and spritz with ink. I tore around the edges so it blended in better. This stamp is also from the New Daisies and Rainbows Set.


Don't forget to watch HOCHANDA on Wednesday - the first show is at 11am. 

Thank you for visiting 


A wave from me...

Hi there, Nikki here.
I have loved playing with some of the amazing products from Oak House Studio as part of their design team.  So many things that you can create with good quality inks and stamps....

So, a little about me...... I live in Scotland just outside Edinburgh with my two mad rescue springy things..... I just adore my pupsters. And, if a beautiful part of the country that I stay in, very inspirational.  I work part time as a support assistant in a local high school and I teach and create crafty things the rest of the time.

I love all things inky, so getting to play along with the Oak House Studio dt has just been great!

Here is my first card that I wanted to share with you,

 By masking off some of the card, then spraying ink... you can create a colourful strip for the background of your card.
 I sprayed Jubilee Red onto some cream card stock and then stamped onto this the leaves from the Bumper Winter Leaves set.  I stuck the leaves together and added a lemon layer to create this flower. Really easy to do and very effective.

Keep popping back to the blog to see what the others have been making and creating.
I'll be back soon with a tutorial to share with you.

Until then
Happy Crafting

Nikki x