EDITED: Ekk life has been a bit manic recently and I posted Nick's post this morning and forgot to explain about this month's TAKE 5 challenge.... This months topic is Rainbows.... as many bright colours as you like. Show me some colour! Post your Challenge entry on your blog or your Facebook page. Just make sure you tell us it is there. Now back to Nick...
Morning. I am very excited to share this post with you today, after being invited by the Lovely Lynnda of Oak House Studios to be a guest designer. The theme is 'Rainbow' which gave me the scope to create something very different, I chose to design a wall hanging. I used a selection of the wonderful Colour Chemistry Ink's. They are such rich pigments and the colours are so vibrant, they are great fun to use either in their concentrated form or diluted to give the shade required.
Morning. I am very excited to share this post with you today, after being invited by the Lovely Lynnda of Oak House Studios to be a guest designer. The theme is 'Rainbow' which gave me the scope to create something very different, I chose to design a wall hanging. I used a selection of the wonderful Colour Chemistry Ink's. They are such rich pigments and the colours are so vibrant, they are great fun to use either in their concentrated form or diluted to give the shade required.

The base for this project was a piece of reclaimed timber, which I sanded before painting with Slate Grey Cosmic Shimmer Chalk paint.

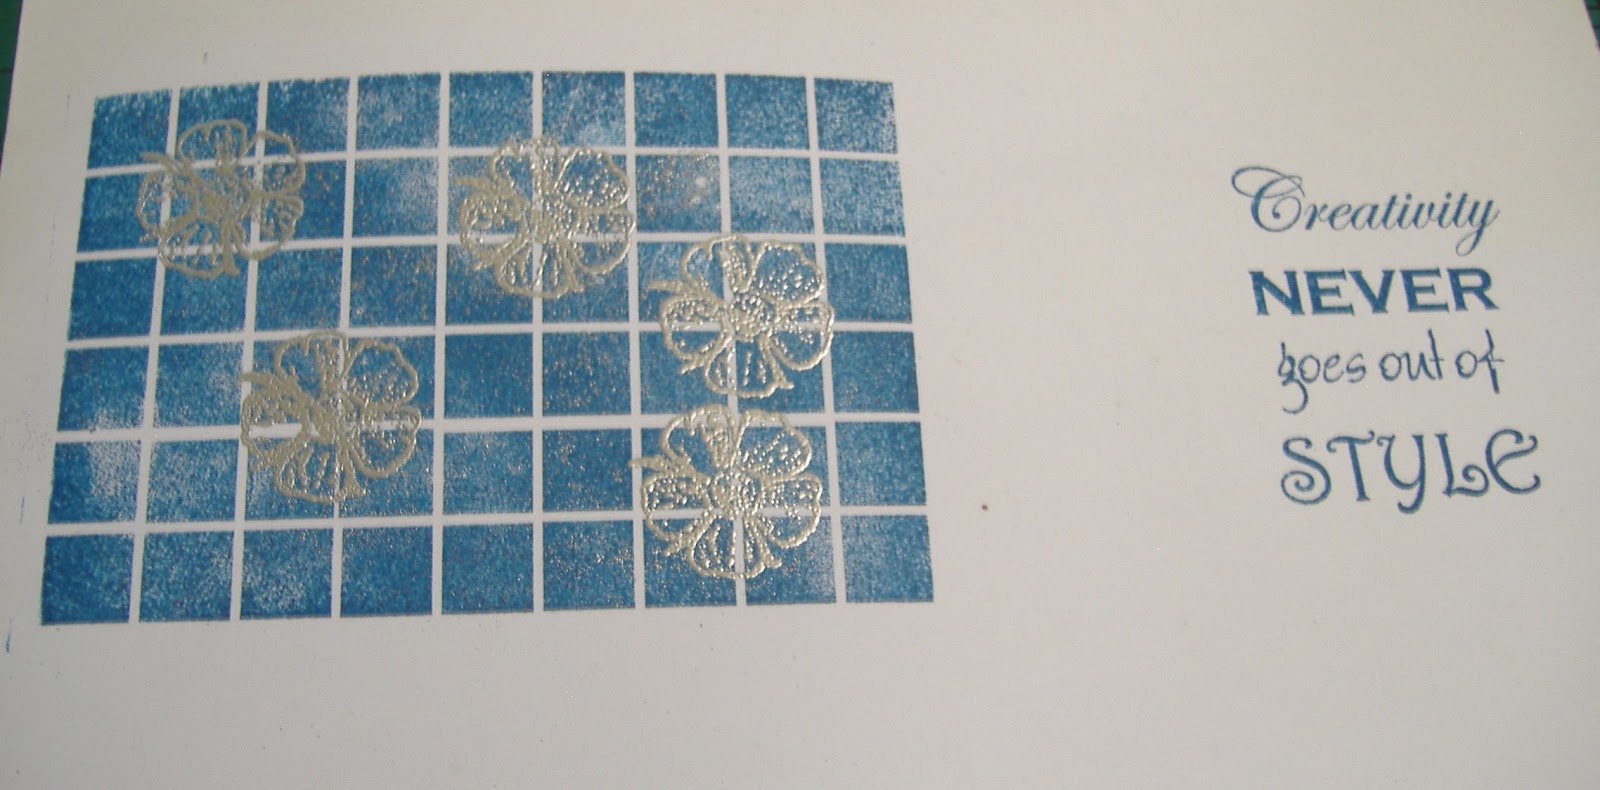
On a piece of Super Smooth Card I stamped the lovely background stamp and a wonderful sentiment from Oak House Studio, using the Navy Blue, Colour Chemistry pigment pad. I love the sentiment, it's so nice to have the mixture of fonts making it more interesting and adds to the feel of the project. I used versamark and Silver Embossing powder to add the Dog Rose to the background.
I then positioned the background and sentiment onto my base, then created a frame made from branches that I cut to size to surround the image. I secured these using 3D glue gel.

Next I cut some lengths of Hemp and dipped them into the bottles of Pure Colour Chemistry Inks, for this project I used Bottled Sunshine, Pumpkin, French Lavender and Totally Turquoise. I was over the moon with the strength and depth of colour, which wasn't lost at all once they had dried.

I took a piece of gauze and moped up all the left over ink from my glass mat and left to dry. I also made some simple round flowers using the Hemp that I had coloured and glued them in position using Cosmic Shimmer glue.

I mixed up some Bottled Sunshine Colour Chemistry ink with Gesso and flicked over the wood to create some added interest and then repeated with some plain white gesso.

I threaded some matching beads onto wire and then assembled the piece. Finally I distressed around the edges of the project with sand paper to bring the elements together.

I hope you have enjoyed the step by step I have shared today. I love this piece with the vibrant rainbow colours, a little bit of a different way to use the lovely stamps and inks.

Thank you ever so much to Lynnda for inviting me to take part in this. I have thoroughly enjoyed using the stamps and the Colour Chemistry Inks are just a pleasure to use, giving such a wide range of results. A must ave crafting essential. I have loved mixing my own colours in the spritzer bottles and have had hours of fun creating different backgrounds.
9 comments:
Fabulous project Nick. Love the vibrant Pure Colour Inks in the rainbow!
Wow wonderful project, love the use of natural products teamed with those vibrant inks, very eye catching :)
Nick what a brilliant idea !! Fabulous work and shows the pure inks off too reveal their true beauty .... feeling inspired thank you x
Fabulous, thanks for sharing xx
Great tutorial and a beautiful colourful result! x
Gorgeous rainbow colours, fabulous design.
Sylv xx
Great project .....love the colours on the grey, really makes them "pop"!
Absolutely fabulous, really shows off the vibrancy of the inks.
Clever project .. great showcase for the fabulous inks.
Post a Comment